Sunrise Farms Chicken & Broccoli: A Complete Cooking Guide
This guide details preparing delicious chicken and broccoli‚ utilizing Sunrise Farms products‚ with various cooking methods for optimal flavor and texture‚ ensuring a satisfying meal.
Understanding Sunrise Farms Chicken
Sunrise Farms chicken is renowned for its quality and flavor‚ making it an excellent choice for pairing with broccoli. Their commitment to responsible farming practices results in a product that’s both tender and flavorful. When selecting Sunrise Farms chicken for this recipe‚ consider bone-in‚ skin-on pieces for maximum juiciness during cooking‚ especially for roasting or sheet pan methods.
The chicken’s natural richness complements the slightly bitter notes of broccoli beautifully. Different cuts‚ like breasts‚ thighs‚ or drumsticks‚ will yield varying cooking times and textures. Understanding these nuances is key to achieving perfectly cooked chicken and broccoli. Always ensure proper handling and storage to maintain freshness and food safety before preparation.
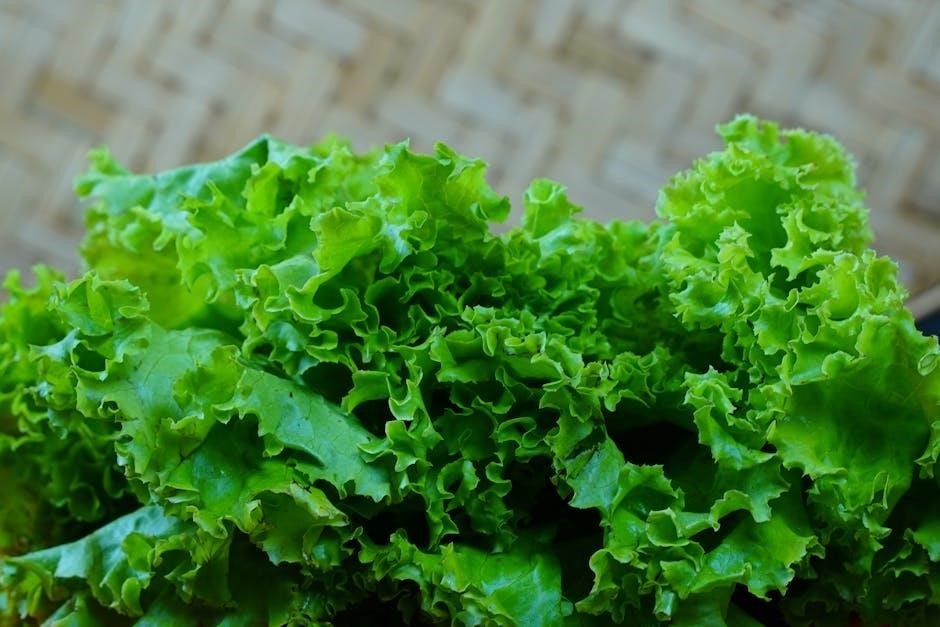
Broccoli Selection & Preparation
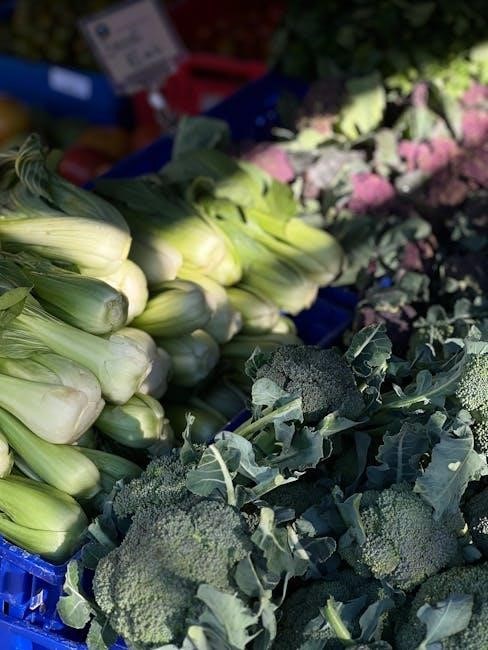
When choosing broccoli for this dish‚ look for firm‚ tightly closed florets with a vibrant green color. Avoid heads with yellowing or wilting‚ as these indicate age. Freshness is paramount for optimal flavor and texture. Before cooking‚ thoroughly wash the broccoli under cold water to remove any dirt or debris.
Cut the broccoli into bite-sized florets‚ ensuring even cooking. The stems are also edible; peel the tough outer layer and slice them thinly. Consider blanching the broccoli briefly in boiling water for a brighter color and slightly tender texture‚ particularly for stir-fries. Proper preparation enhances both the visual appeal and the overall enjoyment of the dish.
Essential Cooking Equipment
To successfully prepare Sunrise Farms Chicken & Broccoli‚ several key pieces of equipment are beneficial. A sharp knife is crucial for efficient and safe vegetable and chicken preparation. A large skillet or wok is ideal for stir-frying‚ ensuring even heat distribution. For oven-roasted or sheet pan methods‚ a sturdy baking sheet is essential.
Measuring cups and spoons guarantee accurate ingredient proportions‚ vital for consistent results. A cutting board protects your countertops and provides a hygienic surface. A reliable meat thermometer is indispensable for verifying the chicken’s internal temperature‚ ensuring food safety. Finally‚ tongs or a spatula are helpful for stirring and transferring food during cooking.
Cooking Methods for Chicken & Broccoli
Explore diverse techniques – from quick stovetop stir-fries to oven roasting and convenient sheet pan dinners – to enjoy Sunrise Farms chicken and broccoli!
Stovetop Chicken & Broccoli Stir-Fry
This method delivers a fast and flavorful meal‚ perfect for weeknights. Begin by preparing your Sunrise Farms chicken‚ cut into bite-sized pieces; A hot wok or large skillet is essential for achieving that desirable stir-fry texture. Ensure the pan is well-coated with oil before adding the chicken‚ cooking until browned and nearly cooked through.
Next‚ add the broccoli florets – pre-blanched for quicker cooking is recommended – along with aromatics like garlic. Continuously stir to prevent sticking and ensure even cooking. The key is high heat and constant movement. Finally‚ pour in your prepared stir-fry sauce‚ coating the chicken and broccoli evenly. Cook for another minute or two‚ until the sauce thickens and glazes the ingredients. Serve immediately for the best results!
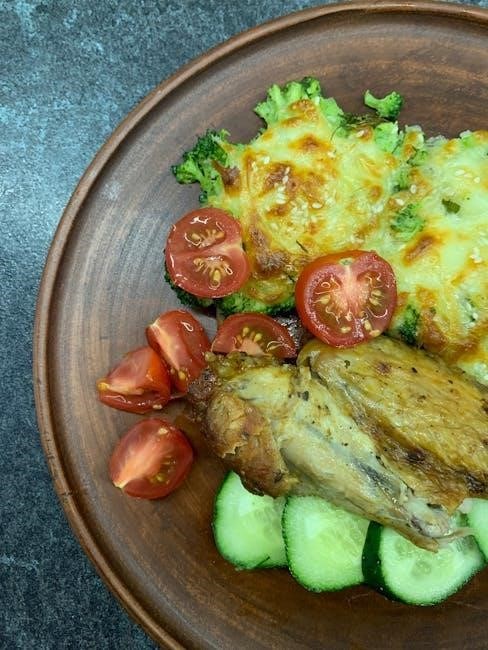
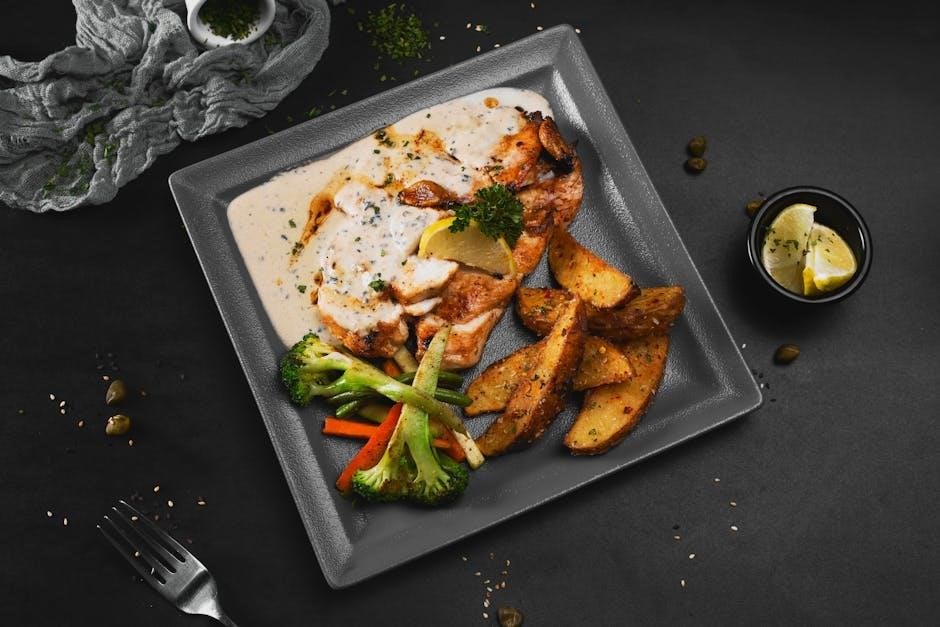
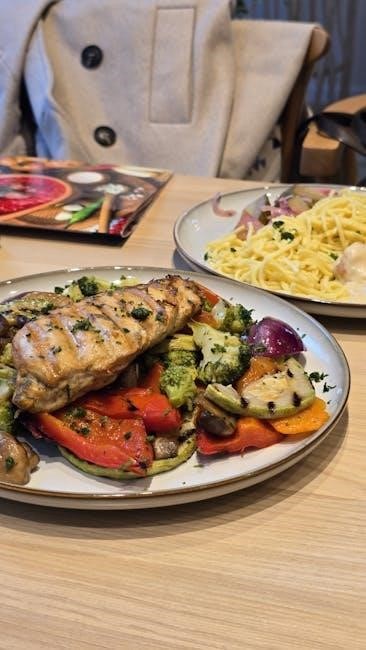
Oven-Roasted Chicken & Broccoli
For a hands-off approach‚ oven-roasting is ideal. Preheat your oven to 400°F (200°C). Toss Sunrise Farms chicken pieces and broccoli florets with olive oil‚ salt‚ pepper‚ and your favorite seasonings. Spread them in a single layer on a baking sheet – avoid overcrowding for even browning.
Roast for approximately 20-25 minutes‚ flipping halfway through‚ until the chicken is cooked through and the broccoli is tender-crisp. The high heat caramelizes the chicken and broccoli‚ creating a delightful flavor. For extra crispiness‚ consider broiling for the last few minutes‚ keeping a close watch to prevent burning. This method is simple‚ healthy‚ and yields a delicious result.
Sheet Pan Chicken & Broccoli
Sheet pan dinners offer convenience and minimal cleanup! Preheat your oven to 425°F (220°C). Line a baking sheet with parchment paper for easy removal. Combine Sunrise Farms chicken (bite-sized pieces work best) with broccoli florets‚ bell peppers‚ and red onion for added flavor.
Drizzle with olive oil‚ garlic powder‚ paprika‚ and a touch of soy sauce or your preferred marinade. Spread everything in a single layer. Roast for 15-20 minutes‚ or until the chicken reaches an internal temperature of 165°F (74°C) and the broccoli is tender-crisp. This method delivers a complete‚ flavorful meal with effortless preparation and cleanup.
Detailed Recipe: Stovetop Stir-Fry
This recipe showcases a quick and flavorful stir-fry‚ combining Sunrise Farms chicken with fresh broccoli‚ utilizing a vibrant sauce for a delicious weeknight meal.
Marinating the Chicken
Preparing the Chicken: Begin by cutting approximately one pound of Sunrise Farms chicken into bite-sized pieces. This ensures even cooking and optimal sauce coverage during the stir-fry process. A crucial step for tender‚ flavorful chicken is marination.
Marinade Ingredients: In a bowl‚ whisk together two tablespoons of soy sauce‚ one tablespoon of cornstarch‚ one tablespoon of rice vinegar‚ a teaspoon of sesame oil‚ and half a teaspoon of ground ginger. This blend tenderizes the chicken and infuses it with Asian-inspired flavors.
Marination Process: Add the chicken to the marinade‚ ensuring each piece is thoroughly coated. Cover the bowl and refrigerate for at least 30 minutes‚ or ideally up to two hours. Longer marination times result in more flavorful and tender chicken. This step is vital for a successful stir-fry!
Preparing the Stir-Fry Sauce
Sauce Base: A flavorful stir-fry sauce is essential. Begin with ¼ cup of low-sodium soy sauce‚ providing a savory foundation. Add 2 tablespoons of oyster sauce for depth and umami‚ complementing the chicken beautifully. For a touch of sweetness‚ incorporate 1 tablespoon of honey or brown sugar‚ balancing the saltiness.
Flavor Enhancers: Introduce 1 tablespoon of rice vinegar for brightness and a teaspoon of sesame oil for nutty aroma. A dash of ground ginger (½ teaspoon) and minced garlic (1 clove) add aromatic complexity. For a slight kick‚ include a pinch of red pepper flakes.
Combining Ingredients: Whisk all ingredients together in a small bowl until well combined. Taste and adjust seasonings as needed. The sauce should be balanced – savory‚ sweet‚ and slightly tangy. Set aside for use during the stir-fry process.
Stir-Fry Cooking Steps
Initial Sauté: Heat 1-2 tablespoons of oil in a wok or large skillet over high heat. Add the marinated chicken and stir-fry for 3-5 minutes‚ until browned and nearly cooked through. Remove chicken and set aside.
Vegetable Stir-Fry: Add the broccoli florets to the wok and stir-fry for 2-3 minutes‚ until crisp-tender. Add sliced bell peppers (if using) during the last minute. Ensure vegetables retain some crunch.
Combining & Sauce: Return the chicken to the wok. Pour in the prepared stir-fry sauce and cook for another 1-2 minutes‚ stirring constantly‚ until the sauce thickens and coats the chicken and broccoli evenly. Serve immediately over rice or noodles.
Safety & Best Practices
Prioritize thorough cooking of Sunrise Farms chicken to a safe internal temperature‚ and avoid overcooking broccoli to maintain its nutritional value and texture.
Internal Chicken Temperature
Ensuring Sunrise Farms chicken reaches a safe internal temperature is paramount for preventing foodborne illness. The USDA recommends cooking chicken to a minimum internal temperature of 165°F (74°C). Utilize a reliable meat thermometer inserted into the thickest part of the chicken‚ avoiding bone contact‚ for an accurate reading.
Different cuts of chicken may require varying cooking times to reach this temperature. Always verify the temperature in multiple spots to guarantee even cooking. Remember that carryover cooking will continue to raise the temperature slightly after removal from the heat source. Prioritizing this step safeguards your health and ensures a delicious‚ worry-free meal featuring Sunrise Farms chicken.
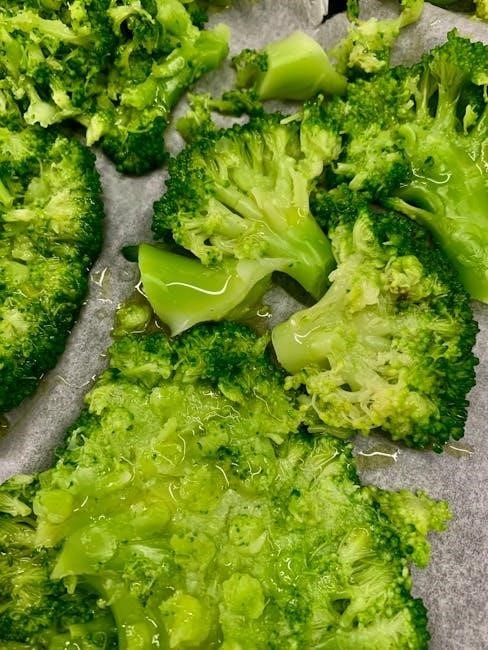
Proper Broccoli Cooking Time
Achieving perfectly cooked broccoli alongside your Sunrise Farms chicken is crucial for a balanced dish. Cooking time depends on your preferred texture – crisp-tender or softer. Steaming broccoli for 5-7 minutes yields a vibrant‚ slightly firm result. For stir-frying‚ 3-5 minutes maintains a desirable crunch.
Roasting requires 15-20 minutes at 400°F (200°C) for tender-crisp florets. Avoid overcooking‚ as broccoli quickly becomes mushy and loses its nutritional value. Regularly check for doneness by piercing with a fork; it should be easily pierced but still offer some resistance. Properly cooked broccoli complements the chicken beautifully.
Food Safety Considerations
Handling Sunrise Farms chicken and broccoli safely is paramount. Always wash hands thoroughly before and after handling raw chicken to prevent cross-contamination. Use separate cutting boards for poultry and vegetables. Ensure chicken is fully thawed before cooking‚ but avoid leaving it at room temperature for extended periods.
Thoroughly cooking chicken to an internal temperature of 165°F (74°C) eliminates harmful bacteria. Proper food storage is also vital; refrigerate leftovers promptly. Be mindful of potential allergens when preparing and serving. Following these guidelines ensures a safe and enjoyable Sunrise Farms chicken and broccoli experience.

Variations & Flavor Enhancements
Elevate your Sunrise Farms chicken and broccoli with spice adjustments‚ additional vegetables like bell peppers‚ or explore diverse sauce alternatives for exciting flavor profiles.
Spice Level Adjustments
Adjusting the spice level in your Sunrise Farms chicken and broccoli stir-fry is remarkably simple and allows for personalized heat. For a mild experience‚ begin with a small amount of garlic and omit chili flakes entirely. To introduce a gentle warmth‚ incorporate ½ teaspoon of chili garlic sauce or a pinch of red pepper flakes.
Those desiring medium heat can increase the chili garlic sauce to 1 teaspoon or add ¼ teaspoon of cayenne pepper. For a significant kick‚ use 1-2 teaspoons of cayenne pepper or incorporate a finely chopped jalapeño pepper‚ removing the seeds for less intensity. Remember to taste as you go‚ adding spice incrementally to achieve your preferred level of heat. A dash of sriracha also provides a flavorful‚ moderate spice boost.
Adding Other Vegetables

Enhance your Sunrise Farms chicken and broccoli dish by incorporating a variety of complementary vegetables! Bell peppers – red‚ yellow‚ or orange – add sweetness and vibrant color. Sliced carrots provide a satisfying crunch and earthy flavor. Snow peas or snap peas contribute a delightful crispness and fresh taste.
Mushrooms‚ such as shiitake or cremini‚ introduce an umami depth. Baby corn offers a subtle sweetness and unique texture. Consider adding sliced onions or scallions for aromatic complexity. When adding vegetables‚ adjust cooking times based on density; harder vegetables require longer cooking than softer ones. Ensure all vegetables are tender-crisp for optimal enjoyment.
Sauce Alternatives
Beyond traditional oyster sauce‚ explore diverse sauce options for your Sunrise Farms chicken and broccoli! A teriyaki sauce delivers a sweet and savory glaze. Peanut sauce introduces a rich‚ nutty flavor profile. Black bean sauce offers a bold‚ umami-packed experience.
For a lighter option‚ consider a lemon-garlic sauce with fresh herbs. A honey-soy glaze provides a balanced sweetness and saltiness. Sriracha-lime sauce adds a spicy kick. When substituting sauces‚ adjust quantities to taste and consider the sodium content. Experiment with different combinations to discover your perfect flavor pairing!
Serving Suggestions & Pairings
Enjoy Sunrise Farms chicken & broccoli with fluffy rice‚ quinoa‚ or noodles. Pair it with a crisp white wine or a light‚ refreshing beer for a complete meal.
Side Dish Options
Complement your Sunrise Farms chicken and broccoli with a variety of delightful side dishes to create a well-rounded and satisfying meal. For a carbohydrate-rich addition‚ consider fluffy white rice‚ fragrant jasmine rice‚ or quinoa‚ offering a healthy and nutty alternative. Noodles‚ such as egg noodles or soba noodles‚ also pair wonderfully‚ especially when tossed with a touch of sesame oil.
To add freshness and vibrancy‚ a simple green salad with a light vinaigrette dressing is an excellent choice. Roasted potatoes‚ seasoned with herbs and spices‚ provide a comforting and hearty accompaniment. Alternatively‚ explore Asian-inspired sides like spring rolls or edamame for a cohesive flavor profile. Don’t forget a warm crusty bread to soak up any delicious sauce!
Wine Pairings
Selecting the right wine can elevate your Sunrise Farms chicken and broccoli experience. A crisp‚ dry white wine is often an excellent choice‚ cutting through the richness of the chicken and complementing the freshness of the broccoli. Pinot Grigio‚ with its light body and citrus notes‚ is a versatile option. Sauvignon Blanc‚ known for its herbaceous flavors‚ also pairs beautifully.
For those preferring red wine‚ a light-bodied Pinot Noir can work well‚ especially if the dish features a sweeter sauce. Avoid overly tannic reds‚ as they may clash with the broccoli. A dry Rosé‚ with its fruity aromas and refreshing acidity‚ offers a delightful alternative. Ultimately‚ choose a wine you enjoy‚ enhancing your overall dining pleasure!
Garnish Ideas
Elevate the presentation of your Sunrise Farms chicken and broccoli with thoughtful garnishes! A sprinkle of toasted sesame seeds adds a nutty flavor and appealing texture. Freshly chopped green onions provide a vibrant color contrast and mild oniony bite. A squeeze of fresh lemon juice brightens the flavors and adds a zesty finish.
For a touch of heat‚ consider a sprinkle of red pepper flakes. Chopped fresh parsley offers a classic‚ herbaceous garnish. Toasted slivered almonds contribute a satisfying crunch. A drizzle of sriracha mayo adds creamy spice. Remember‚ garnishes aren’t just for looks; they enhance the overall taste experience!
Troubleshooting Common Issues
Addressing common problems like dry chicken‚ overcooked broccoli‚ or thin sauce ensures a perfect Sunrise Farms chicken and broccoli dish every time you cook.
Chicken is Dry
Dry chicken is a frequent concern when cooking‚ but easily remedied! Several factors contribute to this issue. Overcooking is the primary culprit; always use a meat thermometer to ensure Sunrise Farms chicken reaches an internal temperature of 165°F (74°C).
Marinating the chicken beforehand‚ as detailed in our recipe‚ is crucial for retaining moisture. A longer marination time – up to 24 hours – yields even better results.
Consider brining the chicken for a few hours before cooking; this process infuses the meat with moisture. When stir-frying or roasting‚ avoid excessive heat‚ which can quickly dry out the chicken. Ensure adequate sauce or oil is used during cooking to maintain juiciness. Finally‚ letting the cooked chicken rest for 5-10 minutes allows the juices to redistribute‚ resulting in a more tender and flavorful outcome.
Broccoli is Overcooked
Overcooked broccoli loses its vibrant color‚ crisp texture‚ and essential nutrients. Achieving perfectly cooked broccoli requires careful attention. Avoid prolonged cooking times‚ especially when stir-frying. Aim for bright green florets with a slight resistance when pierced with a fork.
For stovetop cooking‚ blanching the broccoli briefly in boiling water‚ then shocking it in ice water‚ preserves its color and texture. When roasting‚ monitor closely and remove from the oven before it becomes mushy.
Remember‚ broccoli continues to cook from residual heat‚ so slightly undercooking is preferable. Consider adding broccoli later in the cooking process to prevent overexposure to heat‚ ensuring a delightful crunch in every bite.
Sauce is Too Thin
A thin sauce can detract from the overall flavor and enjoyment of your chicken and broccoli dish. To thicken a sauce‚ create a slurry by mixing one tablespoon of cornstarch with two tablespoons of cold water. Gradually whisk this slurry into the simmering sauce‚ stirring constantly until it reaches your desired consistency.
Alternatively‚ a small amount of flour can be used‚ but ensure it’s fully incorporated to avoid lumps. Reducing the sauce by simmering it uncovered for a few minutes also concentrates the flavors and thickens it naturally.
Avoid adding too much liquid initially‚ and remember that the sauce will thicken as it cooks. Taste and adjust seasonings accordingly.