dyson 14 manual

Dyson DC14 Manual: A Comprehensive Guide

This manual provides detailed instructions for your Dyson DC14 vacuum, covering troubleshooting, maintenance, and safety—ensuring optimal performance and longevity of your appliance.

Access Dyson support via 1-866-693-9766 or www.dyson.com for further assistance, alongside helpful guides and the complete user manual.

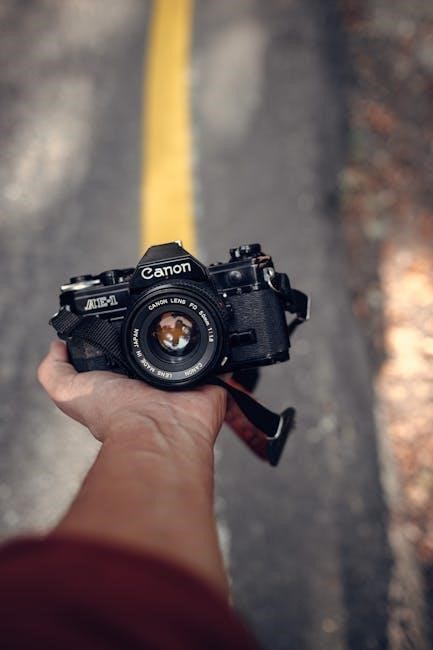
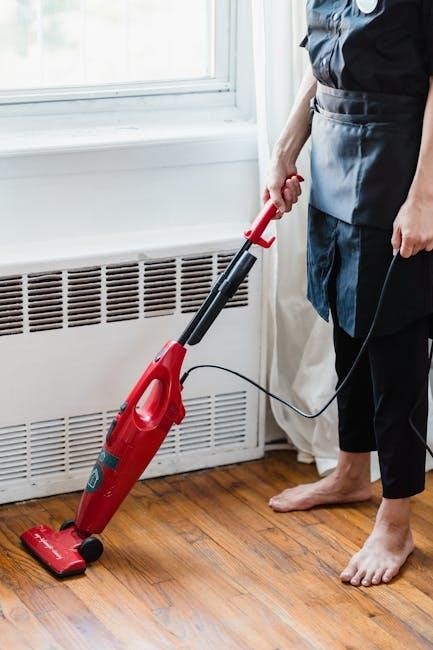
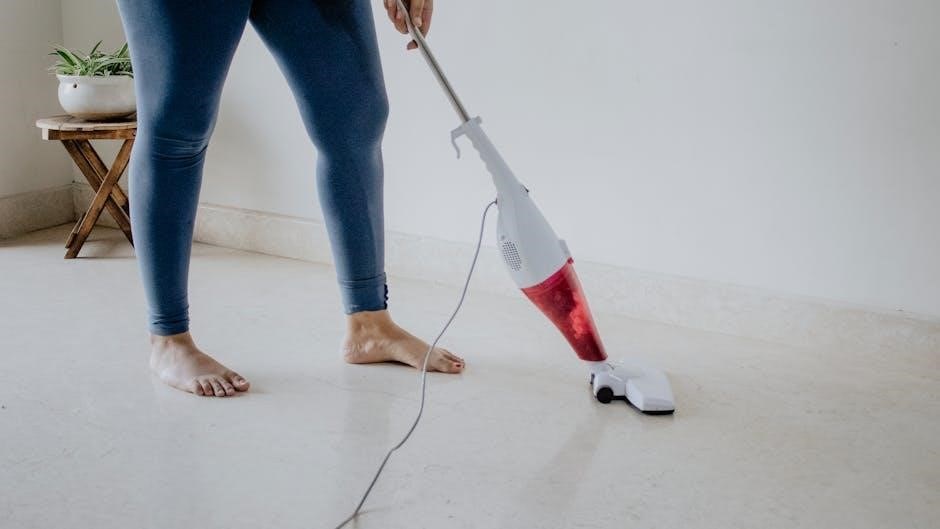
The Dyson DC14 upright vacuum represents a significant advancement in cleaning technology, utilizing powerful cyclonic action to capture dirt and allergens effectively. Released initially in 2006, this model quickly gained recognition for its strong suction and innovative design, distinguishing itself from traditional vacuum cleaners.

This comprehensive guide serves as your primary resource for understanding and maximizing the potential of your DC14. Whether you’re a first-time user or seeking to resolve a specific issue, this manual provides step-by-step instructions, troubleshooting tips, and essential safety information.

The DC14 is designed for homes with various floor types, offering adjustable settings to optimize cleaning performance on carpets and hard surfaces. Proper maintenance, as detailed within, will ensure consistent suction and extend the lifespan of your machine. Remember to consult the official Dyson website (www.dyson.com) or contact their helpline at 1-866-693-9766 for additional support.

Understanding the DC14 Components

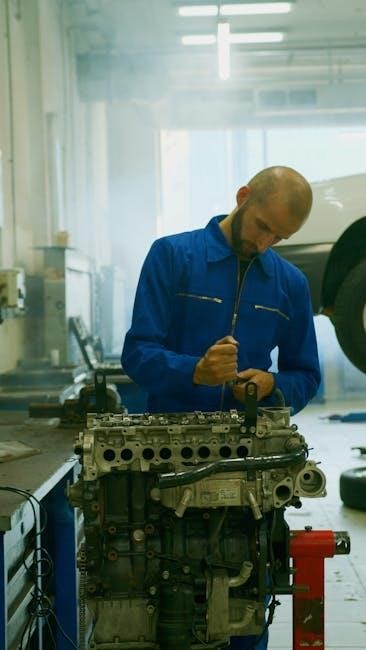
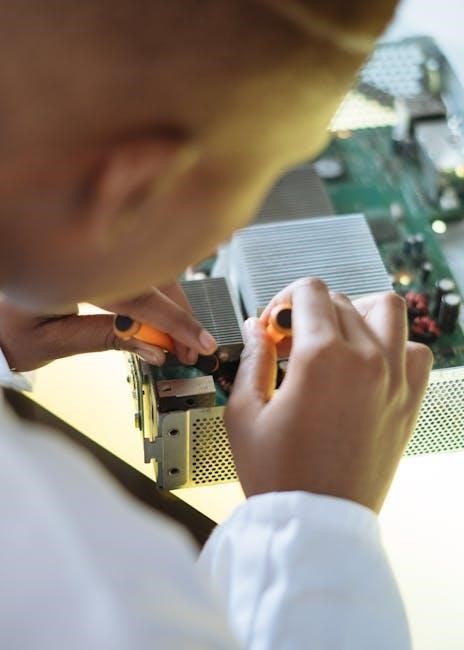
The Dyson DC14 comprises several key components working in harmony to deliver exceptional cleaning performance. The core is the powerful motor driving the radial root cyclone technology, efficiently separating dust and dirt from the airflow. A crucial element is the clear bin, allowing visual confirmation of collected debris and indicating when emptying is required.

The brush bar, often featuring tangle-free technology, agitates carpets to loosen embedded dirt. Adjustable floor settings optimize brush bar height for different surfaces. The wand and attachments provide versatile cleaning solutions for above-floor areas.

Filters, including pre-motor and post-motor filters, capture microscopic particles, ensuring cleaner air exhaust. Regular filter maintenance is vital for sustained suction. Familiarizing yourself with these components, as illustrated on page 4 of the manual, will aid in effective operation and troubleshooting. For detailed diagrams and part identification, refer to Dyson’s online resources at www.dyson.com.

Safety Instructions for Operation

Prioritize safety when operating your Dyson DC14. Always disconnect from the power outlet before performing maintenance or troubleshooting. Never use the vacuum with a damaged cord or plug; contact Dyson support at 1-866-693-9766 for assistance. Do not operate the vacuum outdoors or on wet surfaces to prevent electric shock.

Keep hair, loose clothing, and fingers away from the brush bar during operation. Avoid vacuuming flammable liquids or combustible materials. Ensure the vacuum is stable during use to prevent tipping.

Never block the airflow inlet or exhaust. Refer to page 14 of the manual for specific troubleshooting guidance and safety information. Regularly inspect the vacuum for any signs of damage; Dyson emphasizes responsible usage; consult the complete user manual available at www.dyson.com for comprehensive safety guidelines and warnings.

Setting Up Your Dyson DC14

Proper setup is crucial for optimal performance; assemble the components carefully, ensuring secure connections, before initial use—refer to the Dyson DC14 manual.

Assembling the DC14 Vacuum

Begin by connecting the wand to the main body of the Dyson DC14, ensuring a firm click to secure it properly. Next, attach the chosen floor tool – whether it’s the combination tool for hard floors and carpets, or a specialized attachment – to the wand’s end.

Double-check all connections for stability; loose fittings can reduce suction power. The dust bin should be correctly positioned and locked into place before operation. Refer to page 4 of the Dyson documentation for a visual guide illustrating the correct assembly process.

Ensure the cyclone assembly is securely fitted to the machine body. Incorrect assembly can lead to reduced performance and potential damage. Always consult the user manual for detailed diagrams and step-by-step instructions to guarantee a successful setup.

Powering On and Initial Use

To initiate operation, firmly press the power button located on the Dyson DC14; A smooth, consistent motor sound indicates successful activation. Before vacuuming, visually inspect the floor for any small objects that could cause blockage. Begin with a low-pile carpet or hard floor to assess suction strength.

Gradually increase suction power using the controls, observing the machine’s response. Avoid vacuuming liquids or excessively damp surfaces. For optimal performance, run the vacuum over the area several times, varying the direction.

Familiarize yourself with the machine’s maneuverability and weight distribution. Refer to the user manual for specific guidance on initial use and recommended settings for different floor types. Contact Dyson support at 1-866-693-9766 if any issues arise during the initial operation.

Operating the Dyson DC14

Effectively utilize adjustable suction and floor settings for optimal cleaning. Navigate furniture with ease, ensuring thorough coverage and maximizing the DC14’s cleaning potential.

Adjusting Suction Power

The Dyson DC14 offers variable suction control, allowing you to tailor cleaning performance to different surfaces and debris types. Understanding how to adjust suction is crucial for efficient operation and preventing unnecessary strain on the motor. For delicate fabrics or lightweight dust, reduce suction power to prevent damage or scattering.

Conversely, when tackling stubborn dirt on carpets or hard floors, maximize suction for a deeper clean. The suction control mechanism is typically located on the machine itself, often a slider or dial. Experiment with different settings to find the optimal balance between power and effectiveness for each cleaning task. Remember, higher suction isn’t always better; it’s about using the right amount of power for the job at hand, preserving both your machine and your home.

Using Different Floor Settings

The Dyson DC14 is designed to effectively clean a variety of floor types, from delicate hardwood to deep-pile carpets. Utilizing the correct floor setting is vital for optimal performance and preventing damage to both your floors and the machine. The DC14 typically features a floor type selector, often a switch or dial, allowing you to adjust the brush bar and suction accordingly.

For hard floors, disengage the brush bar to avoid scattering debris and scratching surfaces. For carpets, engage the brush bar to agitate and lift dirt. Some models offer specific settings for different carpet pile heights. Always test a new floor setting in an inconspicuous area first. Proper floor setting selection maximizes cleaning efficiency and extends the lifespan of your Dyson DC14.

Navigating Around Furniture

The Dyson DC14’s maneuverability is key to efficient cleaning around furniture and obstacles. Its steering mechanism allows for precise control, minimizing bumping and scratching. Utilize the wand and hose attachment for reaching under low-clearance furniture, such as sofas and beds, effectively removing dust and debris from hard-to-reach areas.

When cleaning around delicate items, reduce suction power to prevent them from being pulled towards the vacuum. The DC14’s lightweight design further aids in navigating tight spaces. Regularly check the brush bar for tangled hair or fibers, as these can impede movement. Careful maneuvering and appropriate attachment use ensure thorough cleaning without causing damage to your belongings.

Maintenance and Cleaning

Regular maintenance of your Dyson DC14 ensures peak performance; this includes emptying the dust bin, washing filters, and checking for blockages routinely.

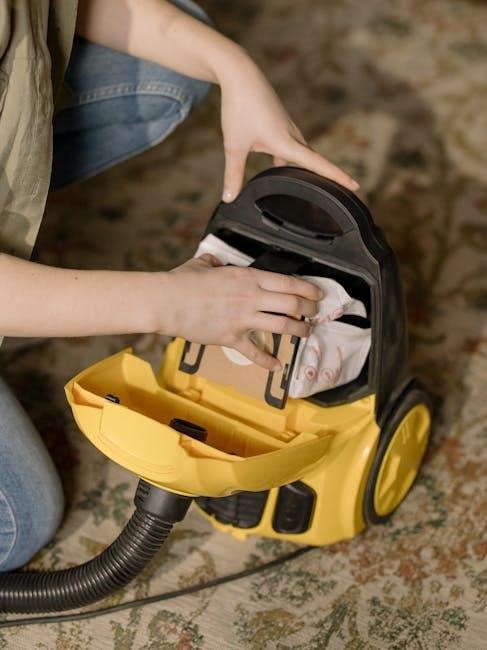
Emptying the Dust Bin (Capacity & Procedure)

The Dyson DC14’s dust bin has a substantial capacity, designed to hold a significant amount of dirt and debris before needing emptying—typically around 0.55 liters.

To empty the bin, detach it from the machine by pressing the release button, usually located on the body of the vacuum. Hold the bin over a suitable waste container, and then push the release lever on the bottom of the bin to allow the contents to fall out cleanly.

Ensure the bin is fully emptied, and then securely reattach it to the Dyson DC14, confirming it clicks firmly into place. Regular emptying—before the bin reaches maximum capacity—maintains optimal suction power and cleaning efficiency. Avoid overfilling, as this can impede performance.

Washing the Filters (Frequency & Method)

Maintaining clean filters is crucial for your Dyson DC14’s performance. Filters should be washed approximately once a month, or more frequently if used in a dusty environment, to ensure consistent suction.

To wash the filters, remove them from the machine—refer to your Dyson DC14 manual for specific location instructions. Rinse the filters under cold water until the water runs clear, avoiding the use of detergents or cleaning agents. Gently squeeze out excess water, but do not wring.

Allow the filters to air dry completely—this can take up to 24 hours—before reinstalling them into the Dyson DC14. Using damp filters can damage the motor. Regular filter maintenance optimizes airflow and prolongs the life of your vacuum.

Checking for Blockages (Common Locations)

Loss of suction in your Dyson DC14 often indicates a blockage. Regularly inspect the hose, wand, and floor tool for obstructions. Begin by disconnecting the hose and wand, visually checking for debris.

Common blockage locations include the hose handle, the wand’s base, and the floor tool’s opening. Use a long, flexible tool – or carefully detach components – to remove any obstructions. Don’t forget to check the brush bar for tangled hair, string, or carpet fibers.

Refer to page 14 of your Dyson DC14 manual for detailed troubleshooting steps. Addressing blockages promptly restores optimal suction and prevents motor strain, ensuring efficient cleaning performance.

Troubleshooting Common Issues

Resolve typical Dyson DC14 problems like suction loss, brush bar malfunctions, or overheating by consulting the manual and Dyson’s online resources.

Loss of Suction – Identifying the Cause

Reduced suction in your Dyson DC14 often stems from several easily addressable issues. First, check the dust bin; a full bin significantly restricts airflow, diminishing cleaning power. Ensure it’s emptied and properly reseated.

Next, inspect the filters – both pre-motor and post-motor – for blockages. Dirty filters impede airflow, causing suction loss. Wash them according to the manual’s instructions and allow them to dry completely before reinstalling.

Common blockages within the wand, hose, or main body of the machine are also frequent culprits. Systematically disconnect and examine each component for obstructions. Refer to page 14 of your Dyson DC14 manual for detailed troubleshooting steps and diagrams illustrating potential blockage locations. A thorough inspection will restore optimal suction.

Brush Bar Not Rotating – Solutions

If the brush bar on your Dyson DC14 isn’t rotating, several factors could be at play. Initially, check for blockages – hair, string, or debris often wrap around the brush bar, preventing movement. Carefully remove any obstructions using scissors, being mindful not to damage the bristles.

Next, examine the belt. A broken or stretched belt will render the brush bar immobile. Replacement belts are readily available through Dyson or authorized retailers. Consult your DC14 manual for instructions on belt replacement.

Finally, a motor fault could be the cause. If the above steps don’t resolve the issue, contact Dyson support at 1-866-693-9766. Page 14 of the manual provides further diagnostic guidance, but professional assistance may be required for motor-related problems.

Overheating – Prevention and Resolution

Overheating in your Dyson DC14 typically indicates a blockage restricting airflow. Immediately switch off the vacuum and unplug it from the power source. Allow the motor to cool completely – this may take up to 30 minutes – before attempting to troubleshoot.

Thoroughly check for blockages in the wand, hose, cyclones, and inlet. Remove any obstructions you find. A clogged filter can also contribute to overheating; ensure the filters are clean and dry, as outlined in the manual.

Preventative measures include regularly emptying the dust bin and cleaning the filters. Avoid vacuuming excessively fine dust or large amounts of debris at once. If overheating persists after these steps, consult page 14 of your Dyson DC14 manual or contact Dyson support at 1-866-693-9766.

Advanced Features & Tips

Maximize your Dyson DC14’s cleaning power by utilizing attachments effectively and maintaining filters; refer to the manual for optimal results.

Using Attachments Effectively

The Dyson DC14 comes equipped with a variety of attachments designed to tackle diverse cleaning challenges beyond standard floor care. Understanding each attachment’s specific function is crucial for maximizing cleaning efficiency. The crevice tool, for instance, excels at reaching tight spaces like corners and along baseboards, effectively removing dust and debris from hard-to-access areas.

The combination tool, featuring a brush and a nozzle, is ideal for dusting upholstery, curtains, and delicate surfaces. Utilize the brush component to gently loosen particles without causing damage, while the nozzle provides focused suction for thorough cleaning. For pet owners, the turbine head attachment is invaluable, effectively removing pet hair from furniture and carpets.

Always consult your Dyson DC14 manual for detailed instructions on attaching and utilizing each tool correctly. Proper attachment usage not only enhances cleaning performance but also protects both your vacuum and the surfaces you are cleaning.

Maximizing Battery Life (If Applicable)

While the Dyson DC14 is a corded vacuum, understanding power management is still beneficial for overall performance and longevity. Avoid using maximum suction power unnecessarily, as this draws more energy. Utilize the variable suction control to adjust power levels based on the surface being cleaned – lower settings for delicate surfaces and higher for deep-pile carpets.

Regularly check for and remove any blockages in the wand, hose, or brush bar. Obstructions force the motor to work harder, potentially shortening its lifespan. Ensure filters are clean and dry, as clogged filters restrict airflow and strain the motor.

Refer to your Dyson DC14 manual for specific guidance on maintaining optimal performance. Following these simple steps will help ensure your vacuum operates efficiently and reliably for years to come.

Understanding Error Codes (If Applicable)

The Dyson DC14, being an earlier model, doesn’t typically display complex digital error codes like newer machines. However, performance issues can indicate underlying problems. A loss of suction is a common symptom, often signaling a blockage in the airway – check the wand, hose, and brush bar thoroughly.

If the brush bar isn’t rotating, inspect it for tangled hair or debris. A non-rotating brush bar significantly reduces cleaning effectiveness. Overheating, while less common, suggests a blockage or a motor issue; immediately switch off the vacuum and allow it to cool.

Consult page 14 of your Dyson DC14 manual for detailed troubleshooting steps. For further assistance, contact Dyson customer care at 1-866-693-9766 or visit www.dyson.com.

Dyson DC14 Specifics ー Page 14 Reference

Page 14 of the Dyson DC14 manual details crucial troubleshooting steps and essential safety information for resolving common operational issues effectively.

Detailed Explanation of Troubleshooting Steps on Page 14

Page 14 of the Dyson DC14 manual focuses on resolving common issues, starting with a visual reference of the vacuum’s components to aid identification. It directly addresses loss of suction, guiding users to check for blockages in the wand, hose, or cyclone.

If the brush bar isn’t rotating, the manual instructs checking for tangled debris or a blocked airway. For overheating, it advises ensuring the bin is empty and filters are clean. The troubleshooting section emphasizes a systematic approach: first, verify power supply, then inspect for obstructions, and finally, consult the detailed diagrams for component locations.

Crucially, it warns against operating the vacuum with a damaged plug or cord and stresses the importance of contacting Dyson customer care at 1-866-693-9766 if problems persist. The page also reiterates vital safety precautions throughout the troubleshooting process.

Important Safety Information from Page 14

Page 14 of the Dyson DC14 manual prominently features critical safety instructions, beginning with a firm warning against using the vacuum outdoors or on wet surfaces. It stresses the importance of disconnecting the power supply before any maintenance or troubleshooting.

The manual explicitly cautions against using the vacuum with a damaged plug or cord, advising immediate replacement. It also warns against running the vacuum over electrical cables, liquids, or flammable materials. Users are instructed to never insert objects into openings, and to keep hair, loose clothing, and fingers away from moving parts.

Furthermore, it emphasizes the need for proper supervision when the vacuum is used near children. Dyson customer care (1-866-693-9766) should be contacted for any concerns regarding safety or operation, ensuring responsible usage.

Contacting Dyson Support

For assistance with your Dyson DC14, reach out to the Dyson Helpline at 1-866-693-9766 or explore comprehensive online resources at www.dyson.com.

Dyson Helpline Number (1-866-693-9766)

Should you require direct assistance with your Dyson DC14 upright vacuum, the Dyson customer care team is readily available to provide expert support and guidance. Simply dial 1-866-693-9766 to connect with a knowledgeable representative who can address your specific concerns;

This helpline is equipped to handle a wide range of inquiries, from troubleshooting operational issues and understanding error codes to clarifying maintenance procedures and resolving warranty-related questions. Be prepared to provide your model number (DC14) and a brief description of the problem you are experiencing to expedite the assistance process.

The Dyson Helpline aims to deliver efficient and effective solutions, ensuring your vacuum cleaner continues to perform at its best. Don’t hesitate to utilize this valuable resource for any challenges you encounter with your DC14.

Online Support Resources (www.dyson.com)

Dyson’s official website, www.dyson.com, serves as a comprehensive hub for all your DC14 support needs, offering a wealth of resources readily accessible at your fingertips. Here, you can download the complete user manual in digital format, providing detailed instructions and diagrams for assembly, operation, and maintenance.

The website also features an extensive troubleshooting section, addressing common issues and offering step-by-step solutions. You’ll find helpful guides, frequently asked questions (FAQs), and informative videos demonstrating proper usage and care for your vacuum. Furthermore, access to parts and accessories is available through the online store.

Dyson’s online platform empowers you to self-resolve many issues, minimizing downtime and maximizing the lifespan of your DC14. Explore the site to unlock the full potential of your cleaning appliance.

wopet automatic pet feeder manual

Wopet Automatic Pet Feeder Manual: A Comprehensive Guide (Updated 03/23/2026)

Welcome! This comprehensive guide unlocks the full potential of your Wopet feeder, exploring creativity and innovation for seamless pet care experiences today.

Welcome to a new era of pet feeding! The Wopet Automatic Pet Feeder is designed to simplify your life and ensure your furry friend is always well-nourished, even when you’re away. This innovative device offers a reliable and convenient solution for maintaining a consistent feeding schedule, promoting your pet’s health and well-being.

This feeder isn’t just about convenience; it’s about peace of mind. Whether you’re facing a busy work schedule, traveling, or simply want to regulate your pet’s portions, the Wopet feeder provides a customizable and automated feeding experience. Explore the possibilities of creativity and innovation with this user-friendly device, designed to integrate seamlessly into your modern lifestyle. This manual will guide you through every step, from initial setup to advanced customization.

What’s Included in the Box?

Upon opening your Wopet Automatic Pet Feeder package, please verify that all components are present. Your box should contain the following items to ensure a smooth setup and optimal performance. You will find one (1) Wopet Automatic Pet Feeder unit, the core of your automated feeding system.

Additionally, the package includes a power adapter for reliable operation, and a set of batteries for backup power during outages. A desiccant pack is included to maintain food freshness. You’ll also receive this comprehensive user manual to guide you through setup and operation. Finally, there is a feeding bowl designed for easy cleaning and pet accessibility. If any items are missing, please contact Wopet customer support immediately for assistance.

Safety Precautions & Important Warnings

Important: Prioritize pet safety when using the Wopet Automatic Pet Feeder. Always supervise your pet during initial use to ensure proper interaction with the device. Never force food into the dispenser; use only recommended food types. Keep the power adapter and cord away from water and chewing pets to prevent electrical hazards.

Do not disassemble the feeder beyond the instructions provided in this manual. Modifications may void the warranty and create unsafe conditions. Ensure the feeder is placed on a stable, level surface. Regularly inspect the food tank and dispenser for any damage or obstructions. Caution: Small parts may pose a choking hazard; keep out of reach of children. Disconnect the power supply before cleaning.

Setting Up Your Wopet Feeder

Let’s begin! This section guides you through the initial setup process, from powering on to connecting to Wi-Fi and app installation.

Initial Power-Up and Battery Installation

Powering On: Begin by locating the power button, typically found on the base or rear panel of your Wopet feeder. Press and hold this button for approximately three seconds until the device illuminates, indicating it’s powering on. A welcome screen may briefly appear.

Battery Installation: Your Wopet feeder supports both AC adapter power and battery backup. To install batteries, locate the battery compartment – usually on the underside of the unit. Open the compartment and insert the required number of batteries (typically D-size), ensuring correct polarity as indicated by the +/- symbols.

Important Note: Always use fresh, high-quality batteries for optimal performance. Mixing old and new batteries, or different battery types, is strongly discouraged. Securely close the battery compartment after installation. The feeder will automatically switch to battery power during a power outage, ensuring uninterrupted feeding schedules.

Connecting to Wi-Fi (2.4GHz Network Required)

Wi-Fi Setup: To unlock the smart features of your Wopet feeder, connecting to a 2.4GHz Wi-Fi network is essential. Ensure your smartphone or tablet is connected to the desired 2.4GHz network before beginning the setup process. The Wopet app will guide you through the connection steps.

App Instructions: Open the Wopet app and navigate to the “Add Device” or “Wi-Fi Settings” section. The app will prompt you to enter your Wi-Fi network name (SSID) and password. Double-check for accuracy, as incorrect credentials will prevent connection.

Troubleshooting: If the connection fails, verify your router is broadcasting a 2.4GHz signal (5GHz is not supported). Restart both the feeder and your router, then retry the connection process. Ensure the feeder is within range of your Wi-Fi signal for a stable connection.

Downloading and Installing the Wopet App

App Access: The Wopet app is your central hub for controlling and monitoring your automatic pet feeder. It’s available for both iOS and Android devices. To begin, search for “Wopet” in the Apple App Store or Google Play Store.

Installation Process: Once located, tap the “Install” button to download and install the app on your smartphone or tablet. The download time will vary depending on your internet connection speed. After installation, tap “Open” to launch the app.

Account Creation: Upon first launch, you’ll be prompted to create a Wopet account. Follow the on-screen instructions, providing a valid email address and creating a secure password. Account creation enables remote access and data synchronization.

Understanding the Wopet App Interface

Navigate with ease! The Wopet app provides intuitive controls for scheduling, portioning, and monitoring your pet’s meals remotely and efficiently.

Dashboard Overview: Key Features at a Glance

Your central hub for pet feeding! The Wopet app’s dashboard offers a clear, concise overview of your feeder’s status and feeding schedule. Immediately visible are the next scheduled meal time and portion size, ensuring you’re always informed.

A prominent indicator displays the feeder’s current connection to your Wi-Fi network, alerting you to any connectivity issues. The remaining food level is graphically represented, preventing unexpected empty bowls. Quick access buttons allow for instant manual feeding and adjustments to the current schedule.

Furthermore, the dashboard provides a log of recent feeding activities, offering valuable insights into your pet’s eating habits. Easily switch between pet profiles if you manage multiple animals. This streamlined interface prioritizes essential information, making managing your pet’s nutrition simple and stress-free.

Meal Scheduling: Setting Timed Feedings

Effortless automation for consistent feeding! The Wopet app simplifies creating a customized feeding schedule tailored to your pet’s needs. Begin by selecting the desired meal time using an intuitive time picker. You can schedule multiple meals throughout the day, accommodating various dietary requirements and routines.

Next, specify the portion size for each meal, ensuring accurate food delivery. The app supports flexible scheduling options, including daily, weekly, and custom repeat patterns. Easily duplicate existing schedules to streamline setup for recurring feeding times.

A clear visual calendar displays your scheduled meals, providing a comprehensive overview. Receive push notifications confirming successful meal dispensing and alerting you to any scheduling conflicts. This feature guarantees your pet receives consistent, timely nutrition, even when you’re away.

Portion Control: Adjusting Food Amounts

Precise feeding for optimal health! The Wopet app offers granular control over portion sizes, ensuring your pet receives the perfect amount of food at each meal. Adjust portions in small increments – typically measured in grams or cups – to fine-tune your pet’s diet.

The app’s intuitive slider or numerical input allows for easy adjustment. Consider your pet’s weight, age, activity level, and dietary recommendations when setting portion sizes. Regularly monitor your pet’s weight and adjust portions accordingly to maintain a healthy body condition.

The Wopet feeder’s accurate dispensing mechanism delivers consistent portions, minimizing overfeeding or underfeeding. Save customized portion settings for different pets or dietary needs. This feature is crucial for managing weight, preventing obesity, and promoting overall well-being.

Manual Feeding: Dispensing Food Immediately

Need to feed your pet outside the scheduled times? The Wopet app provides a convenient manual feeding option, allowing you to dispense food instantly. This feature is perfect for unexpected needs, training rewards, or simply giving your furry friend an extra treat.

Within the app, locate the “Manual Feed” button and select the desired portion size. The feeder will immediately dispense the specified amount of food. This overrides the scheduled feeding plan temporarily, without altering your established routine.

Manual feeding is especially useful during travel, vet visits, or when guests are present. It offers flexibility and peace of mind, ensuring your pet is never left hungry. Remember to account for manually dispensed food when monitoring your pet’s overall daily intake.

Advanced Features & Customization

Unlock personalized pet care! Explore voice recordings, dual power options, multiple pet profiles, and slow feeding mode for optimal control and convenience.

Voice Recording: Personalized Meal Calls

Create a comforting feeding experience for your pet! The Wopet feeder allows you to record a personalized voice message that plays at each scheduled mealtime. This feature is especially beneficial for pets who experience separation anxiety or simply respond well to familiar sounds.

How to record your message: Within the Wopet app, navigate to the “Voice Recording” section. Press and hold the record button while speaking your message – a cheerful call to dinner works wonderfully! Keep recordings concise, ideally under ten seconds, for optimal playback. Preview your recording before saving to ensure clarity and desired tone.

Benefits of voice recording: It can reduce your pet’s stress when you’re away, encourage them to approach the feeder, and create a more positive association with mealtimes. Experiment with different messages to find what best suits your furry friend’s personality!

Dual Power Supply: Battery & Adapter Options

Enjoy uninterrupted feeding with the Wopet’s flexible power system! Your feeder is designed with both an AC adapter and battery backup, ensuring your pet never misses a meal, even during power outages. The adapter provides continuous power for everyday use, while the battery serves as a reliable emergency source.

Battery Installation & Usage: The feeder accommodates D-size batteries (typically 4, check your model). Insert batteries according to the polarity markings inside the battery compartment. The app will display the remaining battery level.

Power Failure Protection: When a power outage occurs, the feeder automatically switches to battery power seamlessly. We recommend regularly checking battery levels and replacing them proactively to maintain consistent operation. Using both power sources provides ultimate peace of mind for responsible pet ownership!

Multiple Pet Profiles: Managing Different Diets

Catering to every furry friend is now effortless! The Wopet app allows you to create individual profiles for each of your pets, accommodating their unique dietary needs and feeding schedules. This feature is perfect for households with multiple animals requiring different food types, portion sizes, or feeding times.

Profile Customization: Within each profile, you can assign a name, breed, weight, and activity level to personalize the feeding plan. Adjust portion control and meal schedules independently for each pet, ensuring everyone receives the optimal nutrition.

Simplified Management: Say goodbye to complicated feeding routines! The app’s intuitive interface makes managing multiple pet profiles simple and efficient, promoting a healthier and happier life for all your companions.

Slow Feeding Mode: Preventing Rapid Eating

Is your pet a speed eater? The Wopet feeder’s innovative Slow Feeding Mode addresses this common issue, promoting healthier eating habits and preventing digestive discomfort. This feature is crucial for pets prone to bloating, vomiting, or rapid weight gain due to gulping down their food.

How it Works: Slow Feeding Mode strategically dispenses smaller portions of food over a longer period, encouraging your pet to eat at a more measured pace. This mimics a natural foraging behavior, reducing the risk of digestive upset.

Customizable Settings: Adjust the slow feeding duration within the app to find the optimal setting for your pet’s individual needs. Prioritize their wellbeing with this thoughtful feature!

Troubleshooting Common Issues

Encountering problems? This section provides solutions for typical Wopet feeder issues, ensuring smooth operation and a happy, well-fed companion consistently.

Feeder Not Dispensing Food

Problem: If your Wopet feeder isn’t dispensing food, first verify the food tank isn’t empty! Sounds simple, but it’s a common oversight. Next, check for obstructions within the dispenser chute – kibble can sometimes become lodged, especially with smaller or irregularly shaped pieces.

Solution: Gently shake the feeder to dislodge any stuck kibble. Ensure the food tank is correctly seated and locked into place. Confirm the programmed meal times haven’t passed or been accidentally deleted within the Wopet app. Also, inspect the motor area for any visible blockages or unusual noises, indicating a potential mechanical issue. If the problem persists, try a power cycle – disconnect and reconnect the power adapter.

Further Assistance: If none of these steps resolve the issue, consult the Wopet app’s help section or contact customer support for more detailed troubleshooting guidance.

Wi-Fi Connection Problems

Issue: Difficulty connecting your Wopet feeder to your Wi-Fi network is a frequent concern. Ensure your smartphone is connected to a stable 2.4GHz Wi-Fi network – the feeder doesn’t support 5GHz networks. Double-check you’ve entered the correct Wi-Fi password within the Wopet app during setup.

Troubleshooting: Move the feeder closer to your Wi-Fi router to improve signal strength. Restart both your router and the Wopet feeder. Within the app, attempt to “re-connect” the device. Confirm your router’s firewall isn’t blocking the feeder’s connection.

Advanced Steps: If problems continue, temporarily disable your router’s security settings (re-enable after testing) or contact Wopet support for assistance with network compatibility.

App Connectivity Issues

Problem: Experiencing difficulties with the Wopet app connecting to your feeder? First, ensure the app is updated to the latest version from your app store. Force close and reopen the app; this often resolves temporary glitches. Verify Bluetooth is enabled on your smartphone, as it’s used for initial pairing.

Troubleshooting: Check your smartphone’s internet connection – a stable data or Wi-Fi link is crucial. Clear the app’s cache (in your phone’s settings). If the feeder appears offline in the app, confirm it’s powered on and within Wi-Fi range.

Further Assistance: Try uninstalling and reinstalling the Wopet app. Contact Wopet customer support if issues persist, providing details about your phone model and app version.

Motor Noise & Jamming

Unusual Sounds: A slight motor hum during dispensing is normal. However, loud grinding or clicking indicates a potential issue. Immediately unplug the feeder and inspect for obstructions. Avoid using excessively large or irregularly shaped kibble, as these can strain the motor.

Food Jams: If food isn’t dispensing, a jam is likely. Power off the feeder, remove the food tank, and carefully clear any blocked food pathways. Ensure dry food isn’t damp or clumped, as this contributes to jamming.

Preventative Measures: Regularly clean the dispenser and food tank. Contact Wopet support if the noise or jamming continues after clearing obstructions.

Maintenance & Cleaning

Regular upkeep ensures optimal performance and hygiene. Consistent cleaning of the tank, dispenser, and bowl prevents buildup and maintains your pet’s health.

Disassembling the Food Tank

Before cleaning, safely disassemble the food tank for thorough hygiene. Locate the release buttons – typically on either side of the tank – and gently press them simultaneously. Lift the tank upwards, away from the feeder base.

Carefully remove the desiccant pack, noting its position for re-insertion later. The desiccant absorbs moisture, keeping food fresh. Detach the rotating dispensing mechanism by twisting it counter-clockwise; it should lift easily.

Inspect all parts for any accumulated food residue. Avoid using excessive force during disassembly; if resistance is met, double-check for hidden locking mechanisms. Proper disassembly facilitates effective cleaning and prevents damage to the feeder’s components, ensuring longevity and optimal performance.

Cleaning the Food Tank and Dispenser

To maintain optimal hygiene, regularly clean the food tank and dispenser. Use warm, soapy water – avoid harsh chemicals or abrasive cleaners. Gently wash all disassembled parts, ensuring all food residue is removed. Pay close attention to the dispensing mechanism, as buildup can affect accuracy.

Rinse thoroughly with clean water to eliminate any soap residue. Allow all components to air dry completely before reassembly. Damp parts can lead to mold growth or food clumping.

For stubborn residue, a soft brush can be used, but avoid scratching the plastic surfaces. A clean, dry cloth can then polish the parts. Regular cleaning prevents bacterial contamination and ensures your pet receives fresh, uncontaminated food.

Cleaning the Feeding Bowl

Maintaining a clean feeding bowl is crucial for your pet’s health. After each use, or at least daily, remove the bowl and wash it with warm, soapy water. Food residue can harbor bacteria and attract pests, potentially causing illness. Ensure all traces of food are removed, paying attention to any crevices.

Rinse the bowl thoroughly under running water, verifying no soap remains. A dishwasher-safe bowl can be conveniently cleaned on the top rack. However, always check the product specifications first.

Dry the bowl completely before reattaching it to the feeder. A damp bowl can contribute to food spoilage. Regular cleaning promotes hygienic feeding and keeps your pet happy and healthy, preventing potential digestive issues.

Replacing the Desiccant Pack

The desiccant pack, typically found within the food storage container, plays a vital role in maintaining food freshness. It absorbs moisture, preventing food from becoming stale or clumping. Over time, the desiccant pack becomes saturated and loses its effectiveness.

Regular replacement – approximately every 1-3 months, depending on humidity – is recommended. Signs the pack needs changing include a diminished drying effect or a change in its physical appearance (e.g., becoming less granular).

Carefully remove the old pack and discard it safely, keeping it away from children and pets. Insert a new, unused desiccant pack into the designated compartment. This simple step ensures optimal food quality and prevents potential spoilage, contributing to your pet’s well-being.

Technical Specifications & FAQs

Discover detailed specs! This section provides crucial power, capacity, warranty details, and answers frequently asked questions for optimal feeder performance.

Power Requirements & Battery Life

Powering Your Feeder: The Wopet Automatic Pet Feeder is designed for versatile power options, ensuring your pet never misses a meal. It operates with a standard AC adapter (DC 5V/2A) – providing consistent power when plugged into a wall outlet. For uninterrupted feeding during power outages, the feeder also incorporates a battery backup system.

Battery Specifications: Typically, the feeder utilizes four D-size batteries (not included). Battery life is dependent on usage frequency and Wi-Fi connectivity. With moderate use (2-3 feedings per day) and Wi-Fi enabled, expect approximately 4-6 weeks of battery life. However, frequent manual feedings or constant Wi-Fi activity will reduce battery duration.

Battery Indicator: The Wopet app and the feeder’s display panel feature a battery level indicator, alerting you when replacement is needed. We recommend using high-quality alkaline batteries for optimal performance and longevity. Always remove batteries if the feeder will not be used for an extended period to prevent leakage and damage.

Food Tank Capacity & Compatible Food Types

Capacity for Consistent Feeding: The Wopet Automatic Pet Feeder boasts a generous food tank capacity, typically ranging from 6 to 7 liters (approximately 25-30 cups), minimizing the frequency of refills. This ample space is ideal for single or multiple-pet households, as well as for owners who travel frequently.

Compatible Food Varieties: This feeder is designed to accommodate a wide range of dry food kibble sizes and shapes. It functions optimally with kibble diameters between 5mm and 15mm. While most standard dry cat and dog foods are suitable, avoid using overly large kibble, wet food, or semi-moist food, as these can clog the dispensing mechanism.

Maintaining Food Freshness: To ensure optimal food quality, store kibble in a cool, dry place before filling the tank. The included desiccant pack helps absorb moisture within the tank, preserving freshness. Regularly inspect the food for staleness or insect contamination.

Warranty Information & Customer Support

Peace of Mind with Our Warranty: Wopet stands behind the quality of its automatic pet feeder with a standard 1-year warranty covering manufacturing defects and malfunctions under normal use. This warranty begins from the original date of purchase. Proof of purchase is required for all warranty claims.

Dedicated Customer Support: Our dedicated customer support team is readily available to assist you with any questions or concerns. You can reach us via email at support@wopet.com or through our website’s live chat feature during business hours (9 AM ⸺ 5 PM PST, Monday-Friday).

Extensive Online Resources: Explore our comprehensive online knowledge base at wopet.com/support for FAQs, troubleshooting guides, and helpful video tutorials. We are committed to providing exceptional support to ensure a positive experience with your Wopet feeder.

Frequently Asked Questions (FAQ) ⸺ Common User Queries

Q: Can I use wet food with the Wopet feeder? A: No, this feeder is designed for dry kibble only. Wet food can clog the dispenser.

Q: What if my pet eats too quickly? A: Utilize the “Slow Feeding Mode” within the app to dispense food over a longer period, preventing rapid eating and potential digestive issues.

Q: Does the feeder work during a power outage? A: Yes! The dual power supply (adapter and batteries) ensures continued operation during power outages. Battery life varies based on usage.

Q: How do I reset the Wi-Fi connection? A: Press and hold the reset button on the feeder for 10 seconds, then follow the Wi-Fi setup instructions in the app.

tst 507 manual

TST 507, often linked to skincare and business ventures, has garnered attention. Investigations as of today, 03/06/2026, continue regarding its operations and practices.

What is TST 507?

TST 507 initially emerged as a skincare brand, prominently marketed in China, and associated with celebrities Zhang Ting and Lin Ruiyang. It gained recognition for its “living” skincare concept and substantial sales, reportedly exceeding 10 billion yuan. However, the brand became embroiled in controversy due to allegations of operating a pyramid scheme. Investigations by the Shijiazhuang Market Supervision Bureau and other authorities were launched, focusing on its business model and tax contributions within the Qingpu District. The brand’s core offerings center around skincare solutions, particularly for dry skin, but its legal standing remains under scrutiny.

The Origins of TST 507

TST 507 originated as a direct-selling skincare venture spearheaded by actress Zhang Ting and her husband, Lin Ruiyang. Launched with a focus on anti-aging products, it rapidly expanded through a network of distributors. The brand’s success was fueled by celebrity endorsements and a multi-level marketing structure. Initial reports suggest the company experienced significant growth, becoming a major tax contributor in the Qingpu District. However, this rapid expansion attracted regulatory attention, leading to investigations into potential pyramid scheme practices and financial irregularities.

Current Status and Investigations (as of 03/06/2026)

As of today, 03/06/2026, TST 507 remains under scrutiny by the Shijiazhuang Market Supervision Bureau, investigating allegations of operating a pyramid scheme. The company asserts cooperation with authorities, yet details surrounding the investigation remain complex. Public opinion is divided, with media coverage shifting as new information emerges. Sales and distribution have been impacted, and brand reputation faces challenges. The future of TST 507 hinges on the outcome of these investigations and potential regulatory actions.

Understanding the Acronym “TST”

TST can signify “Test” or “Thermal Shock Test” in technical contexts. Geographically, it represents Tsim Sha Tsui, a district in Hong Kong.

TST as a Test Abbreviation

TST frequently functions as an abbreviation for “test” within various industries, including technology and manufacturing. This usage emphasizes the critical role of testing in ensuring product quality and service reliability. A well-defined test plan is paramount, encompassing thorough procedures and clear objectives. These tests validate performance, identify potential flaws, and guarantee adherence to established standards. The abbreviation’s simplicity streamlines communication among engineers and technicians, fostering efficiency in development and production cycles. Proper testing protocols are essential for delivering dependable and safe products to consumers, ultimately building trust and brand reputation.

TST as Thermal Shock Test

TST also represents “Thermal Shock Test,” a common physical test in sectors like electronics, aerospace, and mechanical equipment manufacturing. This rigorous process subjects products or components to repeated, extreme temperature fluctuations. The goal is to assess their durability and reliability under harsh conditions, simulating real-world operational stresses. This testing identifies weaknesses in materials and construction, ensuring long-term performance. It’s a crucial step in validating designs and preventing failures, particularly for products intended for demanding environments. The test’s severity is carefully controlled to mimic anticipated usage scenarios.

TST in Relation to Geographic Locations (TST ─ Tsim Sha Tsui)

TST frequently denotes Tsim Sha Tsui, a vibrant district in Hong Kong. Addresses in Hong Kong often utilize abbreviations: Kowloon (KLN), New Territories (NT), and Hong Kong itself (HK). Tsim Sha Tsui is a bustling area known for its shopping, dining, and harbor views. It’s a key tourist destination and commercial hub within the city. Understanding this geographic context is important when encountering “TST” as it may not always relate to testing or other acronymic meanings, but rather a specific location.

TST Court Secret (TST Ting Mi Mi)

TST Ting Mi Mi, linked to Zhang Ting and Lin Ruiyang, faced scrutiny over its business model. Allegations of operating as a pyramid scheme prompted investigations by authorities.

Overview of TST Ting Mi Mi

TST Ting Mi Mi, the brand associated with Zhang Ting and Lin Ruiyang, rapidly gained prominence within the Chinese skincare market. It initially presented itself as a direct-selling company focused on innovative skincare products, promising youthful results. However, the brand quickly became embroiled in controversy due to its multi-level marketing structure. Concerns arose regarding its operational methods, with critics alleging a pyramid scheme disguised as legitimate commerce. This led to increased scrutiny from regulatory bodies, specifically the Shijiazhuang Market Supervision Bureau, initiating a formal investigation into the company’s practices and financial dealings. The brand’s success was heavily reliant on celebrity endorsements and a network of distributors.

Zhang Ting and Lin Ruiyang’s Involvement

Zhang Ting and her husband, Lin Ruiyang, were the driving forces behind TST Ting Mi Mi. As prominent celebrities, their endorsements and active participation were crucial to the brand’s initial success and rapid expansion. They were not merely figureheads; they were deeply involved in the company’s operations and promotional strategies. Their established fame and influence attracted a vast network of distributors and customers. However, their celebrity status also amplified the scrutiny when allegations of a pyramid scheme surfaced, placing them at the center of the investigation and public debate.

The Business Model and Allegations of Pyramid Scheme

TST Ting Mi Mi operated on a multi-level marketing (MLM) model, relying heavily on recruitment of distributors. Concerns arose that the primary focus shifted from product sales to recruiting new members, with commissions heavily weighted towards recruitment rather than actual retail. This structure led to accusations of operating as an illegal pyramid scheme, where profits are derived from enrolling others, rather than genuine product demand. Regulatory investigations focused on determining if the business prioritized recruitment over legitimate sales, potentially harming distributors and consumers.

Taxation and Financial Aspects

TST contributed significantly to Qingpu District’s tax revenue, reportedly exceeding 2.1 billion yuan annually. Sales estimates suggest revenue surpassing 10 billion yuan.

TST’s Tax Contribution in Qingpu District

TST’s substantial tax contribution to the Qingpu District has been a focal point of discussion. Reports indicate a remarkable tax payment of approximately 2.1 billion yuan, establishing the company as a leading taxpayer within the region. However, conflicting reports suggest figures ranging from 1.2 to 1.3 billion yuan. Regardless, this significant financial input translates to an estimated sales volume exceeding 10 billion yuan, positioning TST favorably when compared to established cosmetic brands like Shanghai Jahwa and Nivea. This substantial revenue generation underscores the scale of TST’s operations and its impact on the local economy.

Sales Revenue Estimates

TST’s impressive tax contribution of 2.1 billion yuan (with estimates varying between 1.2-1.3 billion yuan) to the Qingpu District suggests substantial sales revenue. Analysts estimate that to generate such tax revenue, TST’s sales likely surpassed 10 billion yuan. This figure places TST’s performance above established cosmetic companies like Shanghai Jahwa and Nivea. The brand’s success is attributed to its strong brand recognition and the influence of celebrity endorsements, particularly from Zhang Ting. These revenue estimates highlight TST’s significant market presence and rapid growth.

Comparison with Established Cosmetic Brands

TST’s reported sales exceeding 10 billion yuan position it competitively against established cosmetic brands like Shanghai Jahwa and Nivea. However, unlike these companies with long-standing reputations, TST rapidly gained market share through a multi-level marketing model and celebrity endorsements. While traditional brands focus on retail and established distribution channels, TST leveraged a network of distributors. This difference in approach contributed to TST’s rapid growth, but also fueled allegations of operating a pyramid scheme, impacting its comparison to conventional brands.

Surgical Procedures and TST

PPH and TST hemorrhoid treatments are considered outdated by some surgeons, with traditional techniques like excision and ligation now preferred for better outcomes.

PPH and TST as Outdated Hemorrhoid Treatments

Recent medical discussions indicate that procedures like PPH (Park-Walker Hemorrhoid Stapler) and TST (Transanal Hemorrhoidal Dearterialization) are increasingly viewed as less desirable options for hemorrhoid treatment. Doctors now often favor traditional methods, including excision and ligation techniques, citing improved patient outcomes and reduced recurrence rates.

These older methods, while potentially more invasive, offer greater precision and control during the procedure. The shift away from PPH and TST reflects a growing emphasis on individualized patient care and evidence-based surgical practices, prioritizing long-term effectiveness and minimizing complications.

Traditional Hemorrhoid Surgery Techniques

Established hemorrhoid surgery encompasses several time-tested methods. Excision involves surgically removing hemorrhoidal tissue, offering effective relief for larger hemorrhoids. Rubber band ligation utilizes small bands to cut off blood supply, causing the hemorrhoid to shrink and fall off. Traditional hemorrhoidal stapling, differing from PPH, provides another excision option.

These techniques, while sometimes associated with post-operative discomfort, generally demonstrate high success rates and long-term durability. Surgeons often combine methods, like excision with ligation, for optimal results, tailoring the approach to each patient’s specific condition and severity.

Alternative Hemorrhoid Treatment Options

Beyond traditional surgery, several non-surgical options exist for hemorrhoid management. Sclerotherapy involves injecting a solution to shrink hemorrhoidal tissue, offering a less invasive approach. Infrared coagulation (IRC) uses heat to destroy tissue, promoting healing. Lifestyle modifications, including increased fiber intake and hydration, are crucial preventative measures.

Topical creams and suppositories provide symptomatic relief, reducing pain and inflammation. While these alternatives may not be suitable for severe cases, they offer viable options for milder symptoms, improving quality of life without surgical intervention.

Product Usage and User Experiences

TST products are marketed as skincare solutions, particularly for dry skin, with a “living” skincare concept. Users report positive experiences and noticeable improvements.

TST as a Skincare Solution for Dry Skin

TST skincare products are frequently promoted as highly effective for individuals struggling with dry skin conditions. User testimonials consistently highlight improvements in skin hydration and overall texture. The brand emphasizes a unique “living” skincare approach, suggesting the products actively work with the skin’s natural processes. Many users report a noticeable reduction in dryness, flakiness, and tightness after incorporating TST into their routines. This positive feedback contributes to the brand’s popularity, particularly among those seeking solutions for persistent dryness. The perceived benefits are a key driver of consumer interest.

User Reviews and Testimonials

TST garners diverse user feedback, ranging from highly positive to critical. Many reviewers praise the products’ effectiveness, particularly for dry skin, noting improvements in hydration and texture. Some users attribute youthful appearances to consistent TST use, referencing Zhang Ting’s own skin as evidence. However, concerns regarding the business model and potential pyramid scheme allegations frequently surface in online discussions. A significant portion of reviews acknowledge the brand’s strong marketing and celebrity endorsements, influencing purchasing decisions. Overall, experiences appear highly individualized.

The “Living” Skincare Concept

TST promotes a unique “living” skincare philosophy, suggesting its products contain active ingredients that continue to evolve and benefit the skin post-application. This concept, heavily marketed, implies a dynamic interaction between the skincare and the user’s complexion. Users describe a sensation of warmth or activity upon application, attributing it to this “living” effect. Critics question the scientific basis of this claim, suggesting it’s primarily a marketing tactic. The brand leverages this idea to justify its pricing and perceived efficacy.

Legal and Regulatory Issues

TST faces scrutiny from authorities like the Shijiazhuang Market Supervision Bureau, investigating potential pyramid scheme allegations and ensuring compliance with regulations.

Investigation by the Shijiazhuang Market Supervision Bureau

The Shijiazhuang Market Supervision Bureau initiated an investigation into Zhang Ting’s company, TST Ting Mi Mi, suspecting it of operating an illegal pyramid scheme. This action stemmed from numerous complaints regarding the business model and sales practices. The bureau’s investigation focuses on determining whether TST’s multi-level marketing structure violates regulations prohibiting pyramid schemes. Public attention intensified due to the involvement of celebrities like Zhang Ting and Lin Ruiyang, further fueling scrutiny. The investigation aims to protect consumers and ensure fair market practices, with potential consequences including fines and operational restrictions for TST.

Cooperation with Regulatory Authorities

TST, facing scrutiny from the Shijiazhuang Market Supervision Bureau, issued a statement affirming its cooperation with the ongoing investigation. The company acknowledged the complexity of the case and expressed a commitment to transparency. Despite initial reluctance to provide detailed responses due to the sensitive nature of the inquiry, TST pledged to fully assist authorities in their review of its business practices. This cooperation is crucial for a swift and thorough resolution, potentially mitigating further legal repercussions and restoring public trust.

Public Opinion and Media Coverage

TST’s case has ignited significant public debate and extensive media coverage, initially leaning towards critical perspectives. However, recent reporting revealed a nuanced narrative, prompting a 180-degree shift in public sentiment. Media investigations uncovered complexities surrounding the allegations, leading to increased scrutiny of the initial claims. This evolving coverage has fueled discussions about fairness and the potential for misjudgment, highlighting the power of informed reporting in shaping public perception regarding the ongoing investigation.

Connections and Associations

TST has notable connections with celebrities like Tao Hong and Xu Zheng, raising questions about their involvement given Zhang Ting and Lin Ruiyang’s central roles.

Relationships with Other Celebrities (Tao Hong, Xu Zheng)

TST’s connections to prominent figures like Tao Hong and Xu Zheng have surfaced amidst investigations. Initially close friends and business associates with Zhang Ting and Lin Ruiyang, their involvement—or lack thereof—became a focal point. Questions arose regarding whether they profited from or actively participated in the TST business model, particularly given allegations of a pyramid scheme.

Reports suggest inquiries were made into their financial ties and knowledge of TST’s operations. The extent of their awareness and participation remains a subject of public scrutiny and ongoing investigation, adding another layer of complexity to the case.

International Competitions and TST

While TST primarily operates within China, references suggest potential links to international competitions, though these appear tangential. Some sources mention national teams participating in events like the Romanian Masters Cup, occasionally using “TST” as a designation. However, it’s noted that this usage isn’t standardized or widespread, particularly within China itself.

The connection remains unclear, potentially representing a separate, unrelated use of the acronym. Further investigation is needed to determine if these competitions have any direct bearing on the TST skincare brand and its associated controversies.

Technical Specifications (If Applicable)

TST 507’s technical details are scarce; however, as “TST” can denote Thermal Shock Testing, procedures involve repeated temperature fluctuations for product durability.

Potential Technical Manual Details

A hypothetical TST 507 technical manual, if one existed for the skincare line, would likely detail ingredient lists, manufacturing processes, and quality control standards. Considering “TST” also signifies Thermal Shock Testing, a manual for related equipment would outline testing parameters – temperature ranges, cycle durations, and acceptance criteria.

It might include calibration procedures for testing chambers, data logging protocols, and troubleshooting guides for common equipment malfunctions. Safety precautions regarding high/low temperatures and electrical components would be essential. For skincare, batch numbers, expiry dates, and storage conditions would be crucial details. The manual could also reference relevant industry standards and regulatory compliance information.

Testing Procedures (Related to Thermal Shock Test)

TST (Thermal Shock Test) procedures involve subjecting components to rapid, extreme temperature changes. A typical cycle might involve transitioning from -40°C to 85°C within a specified timeframe, often repeated multiple times. Equipment includes environmental chambers capable of precise temperature control and rapid transitions.

Testing assesses material resilience, identifying potential cracking, deformation, or functional failures. Data logging monitors temperature profiles and component performance. Acceptance criteria define allowable deviations. Procedures must adhere to industry standards, ensuring consistent and reliable results. Post-test inspections involve visual checks and functional testing to evaluate damage.

Material Composition (If Applicable)

Regarding TST 507’s skincare products, detailed material composition information is currently limited due to ongoing investigations. However, user descriptions highlight a focus on “living” skincare, suggesting biological components. Ingredients likely include water, emulsifiers, and various cosmetic additives, potentially with proprietary formulations.

Analysis of product packaging and available documentation may reveal further details. Concerns regarding undisclosed ingredients and potential health risks have fueled regulatory scrutiny. Transparency in material composition is crucial for consumer safety and product evaluation, a key aspect of the current investigations.

The Impact of the Investigation

The investigation significantly impacted TST’s brand reputation, causing sales declines and distribution disruptions. Future prospects remain uncertain pending regulatory outcomes and public perception.

Changes in Brand Reputation

Initially enjoying considerable fame, fueled by celebrity endorsements from figures like Zhang Ting and Lin Ruiyang, TST’s reputation suffered a dramatic reversal following investigations into alleged pyramid scheme practices. Public opinion shifted considerably, with media coverage amplifying concerns about the business model.

The Shijiazhuang Market Supervision Bureau’s involvement further eroded trust. While some initial support remained, particularly among existing users, the brand now faces an uphill battle to restore its image. The association with potential legal issues has undeniably tarnished TST’s standing.

Effects on Sales and Distribution

Following the investigations and negative publicity, TST experienced a significant decline in sales. Distribution networks, previously reliant on a multi-level marketing approach, faced disruption as confidence waned among distributors. The brand’s substantial tax contribution in Qingpu District—estimated at over 10 billion yuan in sales—is likely to decrease.

The future prospects for TST’s distribution are uncertain, contingent on resolving legal issues and rebuilding consumer trust. A shift away from the current model may be necessary to regain market share and ensure long-term viability.

Future Prospects for TST

TST’s future hinges on navigating ongoing legal and regulatory challenges. Rebuilding brand reputation, severely impacted by allegations of pyramid scheme practices, is paramount. Adapting the business model, potentially moving away from multi-level marketing, could be crucial for regaining consumer trust.

Success depends on full cooperation with authorities and demonstrating transparency. Whether TST can recover its previous sales volume—estimated over 10 billion yuan—remains to be seen, requiring significant restructuring and a renewed focus on product quality.

Comparison with Competitors

TST differentiates itself through a “living” skincare concept and celebrity endorsements, competing with established brands like Shanghai Jahua and Nivea in the market.

Analyzing Similar Skincare Brands

Comparing TST to competitors reveals varying approaches to skincare. Brands like Shanghai Jahua and Nivea focus on mass-market appeal and established formulations. Others, mirroring TST’s strategy, utilize celebrity endorsements to build brand recognition and trust. However, TST’s unique “living” skincare concept, emphasizing cellular activity, sets it apart.

Many brands prioritize traditional research and development, while TST’s marketing heavily relies on user testimonials and the perceived success of its founders. Analyzing ingredient lists and scientific backing reveals differences in product development philosophies, impacting consumer perception and market positioning.

Differentiating Factors of TST

TST’s core differentiation lies in its “living” skincare philosophy and direct-selling business model. Unlike conventional brands, TST emphasizes cellular rejuvenation and utilizes a network of distributors, resembling a pyramid scheme according to allegations. The brand’s association with celebrities, Zhang Ting and Lin Ruiyang, significantly boosts its visibility and perceived effectiveness.

Furthermore, TST’s substantial tax contribution in Qingpu District—reportedly exceeding 10 billion yuan in sales—highlights its rapid growth and market penetration. This contrasts with established brands relying on retail channels and traditional marketing strategies.

Market Positioning

TST strategically positions itself within the premium skincare segment, targeting consumers seeking anti-aging and revitalizing solutions. Leveraging celebrity endorsements and a direct-selling approach, it bypasses traditional retail, fostering a strong brand community. Despite facing scrutiny over its business model, TST maintains a significant market presence, particularly in China.

Its substantial sales revenue—estimated to surpass 10 billion yuan—places it competitively alongside established cosmetic brands like Shanghai Jahwa and Nivea. However, ongoing investigations and public debate impact its brand image and future trajectory.

Resources and Further Information

Accessing details about TST 507 proves challenging; an official website remains unavailable. News articles and regulatory agency websites offer limited, evolving information.

Official TST Website (If Available)

Currently, an officially recognized and consistently accessible TST 507 website is not publicly available. Despite extensive searches, a central online resource providing comprehensive information about the company, its products, or operational details remains elusive. Information regarding the “TST Ting Mi Mi” business model and Zhang Ting’s involvement is primarily sourced from news reports and regulatory filings.

Past online presences have been subject to change or removal, complicating efforts to verify information directly from the source. Users seeking details are advised to rely on official statements from regulatory bodies and credible news outlets for the most up-to-date and accurate information.

News Articles and Reports

Numerous news articles detail investigations into TST 507 (TST Ting Mi Mi), focusing on allegations of pyramid scheme practices and substantial tax contributions in Qingpu District, reaching potentially over 10 billion in sales. Reports from April & December 2024, and July 2023, cover the Shijiazhuang Market Supervision Bureau’s probe and the involvement of celebrities like Zhang Ting, Lin Ruiyang, Tao Hong, and Xu Zheng.

Media coverage also addresses outdated hemorrhoid treatments (PPH & TST) and the brand’s skincare claims for dry skin. These sources provide crucial context regarding the company’s history and current legal standing.

Regulatory Agency Websites

Key regulatory bodies involved in the TST 507 investigations include the Shijiazhuang Market Supervision Bureau, which initially launched the probe into alleged pyramid scheme activities. Accessing their official website could reveal case updates and official statements regarding the ongoing legal proceedings. Further information may be available from the Qingpu District tax authorities, given TST’s significant tax contributions.

Unfortunately, a dedicated official TST website is currently unavailable, hindering direct access to company information. Monitoring these agencies’ sites is crucial for tracking the case’s development.

chariot 2 iscrub 20x manual

Chariot 2 iScrub 20X Manual: A Comprehensive Guide

This manual details operation, maintenance, and troubleshooting for the Chariot 2 iScrub 20X, a battery-powered, stand-on scrubber designed for commercial hard floor cleaning․

The Chariot 2 iScrub 20X represents a significant advancement in commercial hard floor cleaning technology․ This stand-on scrubber is engineered for productivity and maneuverability, offering a robust solution for maintaining various floor surfaces within commercial environments․ Designed with the operator in mind, the iScrub 20X simplifies cleaning tasks while maximizing efficiency․

This manual serves as a comprehensive guide, providing detailed instructions on safe operation, routine maintenance, and effective troubleshooting․ It covers model variations – including CS20, CS24, CSE24, CS24SP, CSX24, and CSXE24 – ensuring users can readily identify and understand their specific machine․ Proper utilization of this manual will contribute to the longevity and optimal performance of your Chariot 2 iScrub 20X․

Model Variations and Identification

The Chariot 2 iScrub 20X series encompasses several models tailored to diverse cleaning needs․ Identifying your specific model is crucial for accessing the correct maintenance procedures and replacement parts․ Key variations include the CS20 (1․006-125․0), alongside the CS24, CSE24, CS24SP, CSX24, and CSXE24 models․

Each model may feature slight differences in specifications or functionality․ Refer to the machine’s data plate, typically located on the chassis, to confirm the exact model number․ This manual provides guidance applicable to all listed variations, but specific details may vary․ Accurate model identification ensures you utilize the appropriate operating instructions and maintenance schedules for optimal performance and longevity of your iScrub 20X․

CS20 Models (1․006-125․0)

CS20 models (1․006-125․0) represent a core offering within the Chariot 2 iScrub 20X line, designed for efficient and reliable hard floor cleaning in commercial environments․ These units are characterized by their robust construction and user-friendly operation․ Operators should consult the comprehensive manual, specifically section 86398220, for detailed instructions pertaining to this model;

Proper utilization of the CS20 requires understanding its specific features and adhering to recommended maintenance schedules․ Regular inspection of brush heads, squeegees, and solution tanks is vital․ This ensures peak performance and minimizes downtime․ Always refer to the parts diagrams for accurate component identification when performing repairs or replacements․

CS24, CSE24, CS24SP, CSX24, CSXE24 Models

The CS24 series – encompassing CSE24, CS24SP, CSX24, and CSXE24 models – builds upon the foundation of the Chariot 2 iScrub 20X platform, offering enhanced capabilities for diverse cleaning applications․ These variations often include specialized features like increased tank capacity or alternative brush configurations․ Operating instructions, detailed in document 86037660, are crucial for safe and effective use․

Users should familiarize themselves with the specific nuances of their assigned model․ Regular maintenance, as outlined in the manual, is paramount for optimal performance․ Proper attention to squeegee condition and cleaning solution application will maximize cleaning efficiency and extend the lifespan of these robust machines․

Safety Precautions and Guidelines

Prior to operating the Chariot 2 iScrub 20X, thoroughly review all safety precautions detailed within this manual (86037660 & 86398220-G)․ Always ensure the machine is on a level surface before starting․ Never operate with damaged components, and immediately report any malfunctions․

Wear appropriate personal protective equipment, including safety glasses and non-slip footwear․ Avoid operating in areas with flammable materials․ Be mindful of pedestrians and obstacles during operation․ Proper battery charging procedures are essential to prevent hazards․ Adherence to these guidelines will ensure a safe working environment and prolong the machine’s operational life․

Understanding the Machine Data Log/Overview

The Chariot 2 iScrub 20X is a commercial-grade, battery-powered stand-on hard floor scrubber (manuals 86037660 & 86398220-G)․ Its design prioritizes productivity and maneuverability․ The machine data log, though not extensively detailed in provided excerpts, likely records operational hours and potential error codes․

Understanding the machine’s core components – the brush head, squeegee, and solution tanks – is crucial for effective operation․ Regular review of operational data can help identify maintenance needs and prevent unexpected downtime․ Familiarize yourself with the machine’s overall functionality to maximize cleaning efficiency and ensure longevity․

Operational Instructions

Before operating the Chariot 2 iScrub 20X, thoroughly review the operator’s manual (86398220)․ This ensures safe and efficient cleaning․ Initial setup involves verifying battery charge and inspecting all components․ Proper cleaning solution application is vital; follow dilution guidelines to avoid damage or ineffective cleaning․

The manual details sections on safety, operations, and maintenance․ Understanding these areas is paramount․ This guide provides instructions for starting, stopping, steering, and maneuvering the machine․ Adhering to these guidelines will maximize productivity and minimize potential issues during operation․

Initial Setup and Battery Charging

Prior to the first use, fully charge the Chariot 2 iScrub 20X batteries․ Refer to the manual (86398220-G) for specific charging instructions and recommended charging times․ Ensure the charging area is well-ventilated and free from flammable materials․ Inspect the battery cables and connections for any damage before connecting to the charger․

Verify the machine is switched off during charging․ Regularly check the battery’s water levels (if applicable) and maintain proper electrolyte levels․ Proper battery maintenance extends battery life and ensures optimal machine performance․ Always disconnect the charger before performing any maintenance or inspection․

Cleaning Solution Application

The Chariot 2 iScrub 20X applies cleaning solution via a solution dispensing system․ Always use Windsor-approved cleaning solutions, diluted according to the manufacturer’s instructions․ Incorrect dilution can damage the machine or leave residue on the floor․ Fill the solution tank with the appropriate diluted cleaning solution, ensuring the tank is not overfilled․

Adjust the solution flow rate based on the level of soiling․ Begin with a lower flow rate and increase as needed․ Regularly inspect the solution lines and nozzles for clogs or obstructions․ Proper solution application is crucial for effective cleaning and preventing damage to the machine․

Operating the iScrub 20X

The iScrub 20X is designed for efficient, stand-on operation․ Before starting, ensure the area is clear of obstructions and personnel․ Familiarize yourself with all controls, including the power switch, steering tiller, and solution/vacuum levers․ Proper operation maximizes cleaning performance and minimizes operator fatigue․

Always adhere to safety precautions outlined in the manual․ Begin operation at a slow speed, gradually increasing as comfort and control are established․ Regularly monitor the machine’s performance and adjust settings as needed for optimal results․ Consistent, correct operation extends machine lifespan․

Starting and Stopping the Machine

To start the iScrub 20X, ensure the battery is fully charged and the key is inserted․ Turn the key clockwise to the ‘ON’ position; the control panel will illuminate․ Verify the safety interlock is engaged before activating the brush and vacuum systems․ To stop, release the safety interlock and turn the key to the ‘OFF’ position․

Always ensure the machine comes to a complete stop before dismounting․ Never leave the machine running unattended․ Follow these procedures consistently to prevent accidental operation and ensure operator safety; Proper shutdown preserves battery life and minimizes wear on components․

Steering and Maneuvering

The Chariot 2 iScrub 20X utilizes a responsive steering wheel for precise control․ Gentle rotations steer the machine; avoid abrupt movements for optimal stability․ The compact design enhances maneuverability in tight spaces․ Utilize a slow speed when navigating obstacles or confined areas․

Familiarize yourself with the machine’s turning radius for efficient operation․ Practice steering in an open area before tackling complex cleaning routes․ Proper maneuvering minimizes cleaning time and prevents damage to surroundings․ Always be aware of pedestrian traffic and adjust speed accordingly․

Maintenance Procedures

Regular maintenance ensures optimal performance and extends the lifespan of your Chariot 2 iScrub 20X․ Adhere to the daily checklist, including rinsing the solution tank and inspecting brushes and squeegees․ Frequent inspections should cover battery connections, tire pressure, and overall machine condition․

Promptly address any identified issues to prevent escalation․ Keep all components clean and free of debris․ Refer to the parts diagrams for proper replacement procedures․ Following these procedures guarantees reliable operation and minimizes downtime, contributing to consistent cleaning results and reduced long-term costs․

Daily Maintenance Checklist

Begin each workday with a thorough inspection․ Rinse the cleaning solution tank with clean water, ensuring no residue remains․ Examine the brush heads for wear or damage, replacing as needed․ Inspect the squeegee blades for tears or stiffness, and clean thoroughly․

Check battery connections for corrosion and ensure they are secure․ Verify proper tire inflation for optimal maneuverability․ Wipe down the machine’s exterior to remove dirt and debris․ Document any observed issues for prompt attention, maintaining a log for tracking maintenance activities and ensuring consistent performance․

Regular Inspection Points

Conduct weekly inspections of critical components․ Thoroughly examine the drive system for unusual noises or wear, addressing any concerns immediately․ Inspect all hoses and connections for leaks or damage, replacing as necessary to prevent fluid loss․ Check the electrical system, including wiring and connectors, for corrosion or fraying․

Evaluate the condition of the squeegee assembly, ensuring proper alignment and functionality․ Verify the operation of safety features, such as emergency shut-off switches․ Document all inspection findings and completed repairs, maintaining a detailed maintenance history for long-term reliability․

Troubleshooting Common Issues

Addressing problems promptly maximizes uptime․ For brush head issues, check for debris or damage, ensuring proper rotation․ Squeegee problems often stem from worn blades or incorrect pressure – adjust or replace as needed․ If the machine won’t start, verify battery charge and check safety interlocks․

Low cleaning performance could indicate insufficient solution flow or clogged nozzles․ Unusual noises may signal drive system problems requiring professional attention․ Always consult the full manual for detailed diagnostics and repair procedures before attempting complex fixes, prioritizing safety and proper operation․

Brush Head Problems

Addressing brush head issues ensures optimal cleaning performance․ If the brush isn’t rotating, first check the drive belt for damage or slippage․ Debris accumulation is a common cause of reduced effectiveness; thoroughly clean the brush and surrounding area․ Inspect the brush bristles for excessive wear, and replace them if needed to maintain scrubbing power․

Uneven scrubbing can indicate an unbalanced brush head or worn bearings․ Ensure proper down pressure is applied, as insufficient pressure reduces cleaning ability․ Always disconnect the power before inspecting or servicing the brush head assembly, prioritizing safety during maintenance․

Squeegee Issues

Proper squeegee function is vital for a streak-free finish․ If water is left behind, check the squeegee blades for wear, tears, or debris buildup․ Adjust the squeegee pressure to ensure firm contact with the floor surface; too little pressure results in streaking, while too much can cause drag․

Inspect the squeegee assembly for damage or misalignment․ Regularly clean the squeegee blades with a mild detergent to remove residue․ Replace worn blades promptly to maintain optimal water pickup and prevent water trails․ Ensure the squeegee is correctly positioned relative to the brush path for efficient water removal․

Parts and Diagrams

Access to detailed parts lists and diagrams is crucial for effective maintenance and repair of your Chariot 2 iScrub 20X․ These resources facilitate accurate identification of components when ordering replacements or performing servicing․ Comprehensive diagrams illustrate the machine’s assembly, showcasing the location of each part․

Refer to the official Windsor documentation for exploded views, part numbers, and detailed specifications․ Online catalogs and service manuals often provide interactive diagrams for easy navigation․ Maintaining a readily available set of diagrams minimizes downtime and ensures correct part selection during repairs․

Windsor Chariot 2 iScrub 20 Deluxe ORB Parts

Sourcing replacement parts for the Chariot 2 iScrub 20 Deluxe ORB model is streamlined through dedicated suppliers․ Key components include brush heads, squeegee blades, filters, and motor assemblies․ Regularly inspect these parts for wear and tear to maintain optimal cleaning performance․

Authorized Windsor distributors offer genuine ORB parts, ensuring compatibility and quality․ Online catalogs provide detailed listings with part numbers and diagrams․ Prioritize genuine parts to avoid compromising the machine’s efficiency and longevity․ Prompt replacement of worn components minimizes downtime and extends the scrubber’s operational life․

Repair Guides and Manual Access

Comprehensive repair guides and operator manuals for the Chariot 2 iScrub 20X are crucial for effective maintenance and troubleshooting․ Access to these resources, including document revision history (86037660, 86398220-G), empowers technicians and operators․

Windsor’s official website provides downloadable manuals in various formats․ These guides detail step-by-step procedures for common repairs, alongside detailed parts diagrams․ Utilizing these resources ensures safe and accurate repairs, minimizing downtime․ Online support forums and video tutorials further supplement the documentation, offering practical assistance and expert advice for all maintenance needs․

Maximizing Productivity and Maneuverability

The Chariot 2 iScrub 20X is engineered for both high productivity and exceptional maneuverability in commercial cleaning applications; Its stand-on design allows for increased visibility and efficient operation within confined spaces․

Optimizing cleaning paths and utilizing the machine’s steering capabilities are key to maximizing efficiency․ Proper brush head selection and solution concentration further enhance cleaning performance․ Regular maintenance, as outlined in this manual, ensures consistent operation and prevents downtime․ Mastering these techniques unlocks the full potential of the iScrub 20X, delivering superior results․

Manual Usage Guide

This Chariot 2 iScrub 20X manual is structured to provide comprehensive guidance for operators and maintenance personnel․ It’s divided into key sections covering safety precautions, operational instructions, maintenance procedures, and troubleshooting․

Familiarize yourself with the ‘Safety’ section before operating the machine․ The ‘Operations’ section details startup, steering, and cleaning solution application․ ‘Maintenance’ outlines daily checks and regular inspections․ Utilize the ‘Troubleshooting’ guide to address common issues․ Diagrams and parts lists are included for repair purposes․ Refer to the document revision history for the latest updates – versions 86037660 and 86398220-G are noted․

Document Revision History (86037660, 86398220-G)

This document reflects the revision history for the Chariot 2 iScrub 20X manual, ensuring users have access to the most current information․ Version 86037660, dated October 20, 2011 (DT), initially outlined machine data log overviews and operational instructions for models CS24, CSE24, CS24SP, CSX24, and CSXE24․

A subsequent revision, 86398220-G, released on August 1, 2017, expanded coverage to include the CS20 1․006-125․0 model․ This update incorporated the complete operator’s manual, detailing safety protocols, operational procedures, maintenance schedules, and troubleshooting guides․ Always verify you are using the latest revision for optimal performance and safety․

tennant t300 parts manual

Tennant T300 Parts Manual: A Comprehensive Guide

This manual details Tennant T300/T300e parts, offering 197 pages of information, including electrical diagrams and standard parts lists for effective maintenance.

The Tennant T300 walk-behind floor scrubber represents a robust and reliable solution for industrial and commercial cleaning applications. This comprehensive parts manual is specifically designed to assist owners, maintenance personnel, and technicians in the proper identification and replacement of components. Understanding the intricacies of the T300’s design, as detailed within this guide, is crucial for maximizing machine uptime and ensuring optimal performance.

This manual covers models including the T300 and T300e (as of July and May 2015), providing detailed breakdowns of key systems. It emphasizes the importance of utilizing TENNANT Company supplied or equivalent parts to maintain the integrity and warranty of your equipment. Proper maintenance, guided by this resource, will contribute to the longevity and efficiency of your Tennant T300 floor scrubber.

Scope of the Parts Manual

This Tennant T300 Parts Manual encompasses a detailed inventory of components for the T300 and T300e models, spanning 197 pages. It provides comprehensive coverage, including electrical diagrams – specifically for the propel membrane system (pages 127-128) – and extensive standard parts lists. The manual facilitates accurate identification of replacement parts, streamlining maintenance procedures and minimizing downtime.

The scope extends to various machine systems, ensuring users can locate parts for scrubbing, solution delivery, electrical, and drive systems. It’s a vital resource for both routine maintenance and complex repairs. This guide references documentation dating back to at least 2015, and aims to support effective troubleshooting and component replacement, always recommending TENNANT-supplied or equivalent parts for optimal performance and warranty compliance.

Key Components and Systems

Tennant T300 systems—scrubbing, solution delivery, electrical, and drive—are thoroughly documented within this manual, aiding in part identification and repair processes.

Scrubbing System Parts

The Tennant T300 scrubbing system relies on several key components, meticulously detailed within this parts manual. This section provides comprehensive breakdowns of the brush and pad driver assembly, crucial for effective floor cleaning. Diagrams illustrate the arrangement of brushes, pads, and associated hardware, facilitating accurate replacement and maintenance.

Detailed views showcase the brush motors, gearboxes, and mounting brackets, enabling technicians to quickly identify and order the correct parts. Furthermore, the manual covers vacuum components integral to the scrubbing process, ensuring efficient removal of dirty solution. Understanding these parts is vital for maintaining optimal scrubbing performance and extending the lifespan of your Tennant T300. Proper identification using the parts catalogue is essential for correct repairs.

Solution Delivery System Parts

The Tennant T300’s solution delivery system is critical for effective cleaning, and this parts manual provides exhaustive details. It meticulously outlines components like the solution tank, responsible for holding the cleaning fluid, and the associated fill and drain systems. Detailed diagrams illustrate the pump assembly, including the motor, impeller, and housing, enabling precise parts identification for repair or replacement;

The manual further breaks down the hose network, nozzles, and valves that distribute the solution onto the floor surface. Understanding the function of each component is crucial for troubleshooting issues like uneven solution distribution or leaks. Utilizing TENNANT Company supplied or equivalent parts ensures compatibility and optimal performance. This section supports efficient maintenance and prolongs the system’s operational life.

Electrical System Overview

The Tennant T300’s electrical system is comprehensively documented within this parts manual, featuring detailed electrical diagrams for the propel membrane model (pages 2-4, p.127-128). It covers the battery pack, crucial for powering the machine, and the associated wiring harnesses connecting all electrical components. The manual identifies key components like the control panel, responsible for operator interface, and the various sensors monitoring machine functions.

Detailed schematics aid in diagnosing electrical faults, ensuring safe and efficient repairs. It emphasizes the importance of using only TENNANT Company supplied or equivalent parts to maintain system integrity and prevent damage. Understanding the system’s layout and component functions is vital for technicians performing maintenance or troubleshooting, guaranteeing optimal machine performance and longevity.

Drive System Components

The Tennant T300’s drive system, crucial for maneuverability, is thoroughly detailed in this parts manual. Key components include the drive motors, responsible for propelling the machine, and the associated gearboxes that translate motor power into usable torque. The manual illustrates the wheel assemblies, including tires and hubs, and the steering mechanism enabling directional control.

Detailed exploded views assist in identifying individual parts for repair or replacement. Proper maintenance of these components is vital for ensuring smooth operation and preventing downtime. The manual stresses the use of TENNANT-approved parts to maintain performance and avoid compatibility issues. Technicians can efficiently diagnose and resolve drive system problems using the provided diagrams and parts lists, maximizing machine uptime.

Specific Parts Breakdown

Detailed breakdowns cover the brush/pad driver, vacuum system, squeegee assembly, and motors/pumps, utilizing parts lists for precise identification and repair.

Brush and Pad Driver Assembly

The Tennant T300 brush and pad driver assembly is a critical component for effective floor scrubbing. This section details the various parts comprising this system, ensuring optimal cleaning performance and longevity. Key components include the brush head itself, available in multiple bristle types for diverse floor surfaces, and the pad driver, designed to accommodate various pad materials for polishing or light scrubbing.

Detailed diagrams illustrate the assembly’s construction, showcasing parts like the brush skirt, mounting plate, and associated hardware. Proper maintenance of this assembly involves regular inspection for wear and tear, replacing worn brushes or pads, and ensuring secure mounting. Utilizing TENNANT Company supplied or equivalent parts is crucial for maintaining the assembly’s integrity and preventing damage to the machine. This breakdown facilitates efficient repairs and minimizes downtime, keeping your T300 operating at peak efficiency.

Vacuum System Parts

The Tennant T300’s vacuum system is essential for removing dirty solution after scrubbing, leaving floors clean and dry. This section provides a comprehensive breakdown of its components. Key parts include the vacuum motor, responsible for generating suction; the vacuum skirt, which directs airflow; and the solution hose, conveying the waste liquid to the recovery tank.

Detailed illustrations showcase the arrangement of these parts, alongside supporting elements like filters and connecting hardware. Regular inspection and replacement of filters are vital for maintaining optimal suction power. Utilizing genuine TENNANT parts ensures compatibility and performance. Proper maintenance, as outlined in the manual, prevents clogs and ensures efficient water removal. This detailed parts list facilitates quick repairs and minimizes downtime, maximizing the T300’s cleaning effectiveness and prolonging its operational life.

Squeegee Assembly Details

The Tennant T300’s squeegee assembly is crucial for effectively removing solution from the floor surface, preventing streaking and ensuring a dry, safe finish. This section details each component, including the squeegee blade – available in various materials for different floor types – the squeegee frame, providing structural support, and the adjustable linkages, allowing for pressure customization.

Illustrations clearly depict the assembly’s construction and adjustment mechanisms. Maintaining proper blade contact is vital for optimal performance; worn blades must be replaced promptly. The parts manual emphasizes using genuine TENNANT replacement parts to guarantee compatibility and prevent damage. Correct assembly and adjustment, as detailed within, maximize water recovery and minimize the risk of leaving behind wet patches, contributing to a consistently clean and safe environment.

Motor and Pump Specifications

This section of the Tennant T300 parts manual provides detailed specifications for both the drive motor and the solution pump. It outlines voltage, amperage, horsepower, and RPM ratings for the drive motor, crucial for diagnosing performance issues and selecting appropriate replacement parts. Similarly, pump specifications – including flow rate (gallons per minute), pressure (PSI), and motor type – are thoroughly documented.

Understanding these specifications is vital for troubleshooting and ensuring optimal cleaning performance. The manual stresses the importance of using TENNANT-approved replacement motors and pumps to maintain machine integrity and warranty validity. Diagrams illustrate component locations and wiring configurations. Proper motor and pump function are essential for effective solution delivery and overall machine operation, as detailed within this comprehensive guide.

Maintenance and Troubleshooting

Tennant T300 maintenance relies on standard parts lists and electrical diagrams; proper component replacement ensures optimal function and minimizes downtime.

Standard Parts List

The Tennant T300’s standard parts list, as referenced in documentation dated 07-2015 and 05-2015, is crucial for routine upkeep and repairs. This comprehensive inventory details frequently replaced components, ensuring technicians have readily available resources for efficient servicing. It encompasses a wide array of items, from brushes and squeegee blades to filters and basic hardware.

Accessing this list, often found within the full parts catalogue, streamlines the ordering process and minimizes delays. Utilizing TENNANT Company supplied or equivalent parts is strongly advised to maintain machine performance and warranty validity. The list is often categorized for ease of navigation, grouping parts by system – such as the scrubbing, solution delivery, or vacuum systems – facilitating quick identification of needed replacements. Careful attention to part numbers is essential for accurate ordering and compatibility.

Common Replacement Parts

For the Tennant T300, certain parts experience higher wear and tear, necessitating frequent replacement to maintain optimal performance. These commonly replaced items include brush and pad drivers, squeegee blades, and various filter types – crucial for both scrubbing and vacuum systems. Regular inspection and timely replacement of these components prevent damage to other systems and ensure consistent cleaning results.

Additionally, hoses within the solution delivery system are prone to wear, and periodic replacement is recommended. Electrical components, while less frequent, may require attention based on usage and environmental factors. Always prioritize TENNANT Company supplied or equivalent parts to guarantee compatibility and uphold machine integrity. Referencing the parts manual and standard parts list simplifies identification and ordering, minimizing downtime and maximizing the lifespan of your Tennant T300.

Troubleshooting Electrical Diagrams

Effective troubleshooting of the Tennant T300’s electrical system relies heavily on understanding the provided electrical diagrams. These diagrams, found within the parts manual, detail the wiring schematics for various components, including the propel membrane system, and are essential for diagnosing issues like motor failures or sensor malfunctions. Careful examination of these diagrams allows technicians to trace circuits and identify potential points of failure.

The manual includes diagrams spanning multiple pages (e.g., page 2 of 4, page 3 of 4, p.127, p.128) offering a comprehensive view of the electrical architecture. When using these diagrams, always ensure the version corresponds to your machine’s production date (e.g., Tennant T300 / T300e (05-2015), Tennant T300 / T300e (07-2015)). Proper interpretation, combined with a multimeter, facilitates efficient and accurate repairs.

Safety and Part Compatibility

Always utilize TENNANT Company supplied or equivalent parts for the T300, ensuring optimal performance and maintaining machine safety standards.

Using Tennant Company Supplied Parts

Employing genuine Tennant Company supplied parts is paramount for maintaining the integrity and performance of your T300 floor scrubber. These parts are specifically engineered and rigorously tested to meet Tennant’s exacting standards, guaranteeing a precise fit and optimal functionality. Utilizing non-genuine parts can compromise machine safety, void warranties, and potentially lead to costly repairs down the line.

Tennant parts are designed to work seamlessly with all components of the T300, ensuring consistent cleaning results and prolonged machine lifespan. The company’s commitment to quality extends to every part, from brushes and filters to motors and pumps. Choosing genuine Tennant parts demonstrates a dedication to reliable operation and minimizes downtime, ultimately maximizing your investment. Always verify part numbers and consult the official T300 parts catalogue for accurate identification.

Part Numbering System

Tennant’s meticulous part numbering system is crucial for accurate identification and ordering of replacement components for your T300. Each part number is uniquely assigned, providing a clear and concise identifier for precise matching within the parts catalogue. Understanding this system streamlines the procurement process, minimizing errors and ensuring you receive the correct part for your specific machine configuration.

The part numbers typically consist of a series of digits and/or alphanumeric characters. These codes often indicate the part’s function, the model it’s designed for (T300 in this case), and potentially the manufacturing date or revision level. Referencing the official Tennant parts manual is essential for deciphering the complete meaning of each part number. Accurate part numbers are vital when contacting Tennant support or authorized dealers for assistance.

Resources and Documentation

Access the complete T300 parts catalogue online for detailed diagrams, standard parts lists, and electrical diagrams, ensuring efficient repairs and maintenance.

Accessing the Full T300 Parts Catalogue

Obtaining the complete Tennant T300 parts catalogue is crucial for effective maintenance and repair. While a direct link isn’t provided in the sourced information, searching for “Tennant T300 Parts Catalogue Guide” (referenced as a 204-page PDF) should yield results.

Alternatively, contacting Tennant Company directly through their official website is recommended. They can provide access to the latest digital version of the catalogue, ensuring you have the most up-to-date parts information, including detailed electrical diagrams and comprehensive standard parts lists.

Remember to have your machine’s serial number readily available when contacting Tennant, as this will help them provide the correct catalogue specific to your T300 model. Utilizing official Tennant resources guarantees compatibility and accurate parts identification.

stanley battery charger manual

Stanley battery charger manuals are essential resources․ They offer comprehensive guidance for safe, efficient operation․ These documents ensure users understand features and maximize performance․ Access user, operating, and service manuals, often as PDF downloads․

Importance of Reading the Manual

Reading the instruction manual for your Stanley battery charger is not merely a suggestion; it’s a fundamental step for ensuring safety, optimal performance, and longevity of your device․ Upon acquiring your new charger, the included manual serves as your primary guide, meticulously detailing every aspect of its operation․ It is imperative to follow these instructions carefully before any use, as highlighted by Stanley itself․

The manual provides crucial information ranging from essential safety guidelines to detailed product descriptions and technical specifications․ For instance, it instructs users on how to properly determine the battery voltage by referring to the vehicle owner’s manual, ensuring that the charger’s output voltage is correctly matched․ This prevents potential damage to both the battery and the charger․ Without consulting these vital documents, users risk improper operation, voiding warranties, and even creating hazardous situations․ Stanley manuals are specifically designed to help put your tools into operation correctly and safely, making them indispensable resources for every owner․

Congratulations on Your Purchase

Congratulations on your excellent choice and the recent purchase of your Stanley battery charger! You have now acquired a high-quality, reliable tool designed to meet your power maintenance needs with efficiency and safety․ Stanley, a brand synonymous with durability and performance, ensures that your investment will serve you well for years to come, keeping your vehicles and essential equipment ready for action whenever you need them․ This charger is engineered with advanced features to provide optimal battery care, whether you’re performing routine maintenance or recovering a deeply depleted power source with its intelligent charging cycles․ To truly appreciate its capabilities and ensure seamless, trouble-free operation, we strongly encourage you to explore the included instruction manual․ This detailed document is your ultimate resource, packed with essential guidance for proper setup, safe usage, and maximizing the lifespan of both your charger and your various batteries․ Embrace the confidence that comes with owning a superior Stanley product and the power to maintain your essential systems with remarkable ease and precision․ We are confident you will be exceptionally pleased with your new acquisition and its outstanding performance across diverse applications․

Understanding Stanley Battery Chargers

Stanley battery chargers are renowned for providing reliable and efficient power solutions․ Designed for various applications, they ensure optimal charging and maintenance of batteries․ Grasping their fundamental operation is crucial for maximizing performance and ensuring the longevity of your power sources․

General Description

Stanley battery chargers are meticulously engineered devices designed to provide efficient and reliable power management for a wide array of battery types․ These units serve a crucial role in maintaining battery health, extending their lifespan, and ensuring optimal performance for vehicles, marine applications, and various other equipment․ Typically, a Stanley charger offers a robust solution for both charging depleted batteries and maintaining fully charged ones over extended periods, preventing self-discharge and sulfation․ They are often characterized by user-friendly interfaces, making them accessible for both automotive enthusiasts and general consumers․ The core function involves converting AC power into suitable DC current, tailored to the specific voltage and amperage requirements of the connected battery․ Users are consistently advised to consult their vehicle owner’s manual to correctly match the battery voltage with the charger’s output, a fundamental step in safe and effective operation․ Stanley chargers often incorporate advanced safety features, protecting against overcharging, reverse polarity, and short circuits, underscoring their commitment to user safety and equipment integrity․ This makes them a dependable choice for anyone needing a consistent and secure battery charging solution․

Stanley Trademark Information

The name STANLEY, along with its distinctive logo, represents a globally recognized and trusted brand in the realm of tools and equipment, including battery chargers․ This prominent branding is not merely a label; it signifies a registered trademark, which is a crucial aspect of the company’s intellectual property․ Specifically, STANLEY and the STANLEY logo are protected trademarks owned by Stanley Black & Decker Inc․ or its affiliates․ This legal protection grants Stanley Black & Decker Inc․ exclusive rights to use these marks in connection with their products and services, preventing unauthorized use by other entities․ The trademark serves several vital purposes: it identifies the source of the goods, assuring consumers of the product’s origin and quality; it distinguishes Stanley’s battery chargers from those of competitors in the market; and it embodies the reputation and goodwill that the company has meticulously built over many years․ When consumers see the STANLEY trademark on a battery charger, they associate it with reliability, durability, and performance, attributes that the brand consistently strives to uphold․ Understanding this trademark information reinforces the authenticity and backing of a reputable manufacturer for your Stanley battery charger․

Types of Stanley Battery Charger Manuals

Stanley provides various essential battery charger manuals․ These encompass detailed user manuals, comprehensive operating guides, and in-depth service manuals․ Many are readily available for download as PDF documents, offering crucial support to users for installation, operation, and troubleshooting their devices․

User Manuals

Stanley battery charger user manuals are truly indispensable resources, meticulously designed to guide new owners through every facet of their device․ These comprehensive documents typically commence with a warm congratulatory message, emphasizing the critical importance of reading and following all instructions carefully before initial use․ They provide detailed product descriptions, outlining the charger’s components, functionalities, and intended applications․ Key sections often include crucial safety guidelines, warning the user about potential hazards and outlining necessary precautions to prevent damage to the equipment or personal injury․ Furthermore, user manuals offer step-by-step instructions for setup and initial charging procedures․ For instance, they explain how to determine the battery voltage by referring to the vehicle’s owner’s manual, ensuring the charger’s output voltage aligns correctly․ Troubleshooting tips for common issues are also frequently included, empowering users to resolve minor operational problems independently․ The availability of these user manuals as downloadable PDF files makes accessing this vital information convenient and straightforward, supporting users in putting their tools into operation effectively․ They are fundamental for understanding compatibility and for maximizing the sustained lifespan and efficiency of the battery charger․

Operating Guides

Stanley battery charger operating guides serve as practical companions, offering detailed instructions for the routine, day-to-day use of the charger once initial setup is complete․ These guides delve into the specifics of how to effectively operate your Stanley charger, ensuring optimal performance and safety․ They typically cover crucial aspects such as connecting the charger to a battery, detailing the correct sequence for terminals, and explaining how to select appropriate charging modes, including standard charging or maintenance functions․ For instance, the guides emphasize determining the battery’s voltage to ensure the charger’s output is correctly matched, a vital step for preventing damage․ Information on monitoring the charging process, interpreting LED indicators or display readings, and understanding when a battery is fully charged or requires maintenance, is thoroughly explained․ Troubleshooting common operational issues, like slow charging or error messages that might appear during use, is also a key component․ Stanley operating guides help users put their tools into continuous, reliable operation, ensuring longevity and efficiency․ These resources are readily available, often as downloadable PDF files, making them easily accessible for ongoing reference and support during the lifespan of your Stanley battery charger․

Service Manuals

Service manuals for Stanley battery chargers delve into the intricate technical details required for advanced maintenance, repair, and diagnostics․ Unlike user manuals or operating guides, these documents are primarily aimed at trained technicians or experienced users who need to perform in-depth troubleshooting or component replacement․ A Stanley service manual typically includes comprehensive circuit diagrams, detailed parts lists with ordering information, and step-by-step instructions for disassembling and reassembling the unit․ They often cover calibration procedures, advanced fault-finding charts, and specific testing methodologies for various internal components․ While basic user manuals focus on safe operation, service manuals provide the essential knowledge to restore a faulty charger to full functionality, thus extending its lifespan․ Such specialized guides ensure that repairs are carried out correctly, maintaining the charger’s performance and safety standards․ Availability of these manuals can vary, sometimes requiring access through authorized service channels, but they are crucial resources for complex technical support, complementing the basic operational instructions found in other documentation․ These manuals embody the full technical support aspect for Stanley battery chargers․

Downloading PDF Manuals

Accessing the necessary documentation for your Stanley battery charger is incredibly convenient through PDF manual downloads․ This digital format provides immediate access to a wealth of information, from user guides to comprehensive service manuals, ensuring you have the support needed to operate and maintain your device effectively․ Many Stanley battery charger PDF manuals are readily available, covering a range of models and functionalities․ The ability to download these documents means you can store them on your computer, tablet, or smartphone, allowing for quick reference even when offline․ This eliminates the need for physical copies, contributing to a more sustainable approach․ Users can easily find and download various types, including operating guides and detailed service instructions, directly from official support channels or reputable online repositories․ For instance, numerous Stanley Battery Charger PDF manuals, encompassing user manuals, operating guides, and service manuals, are often available for download․ This immediate accessibility helps users put their tools into operation quickly and efficiently, providing all the critical information at their fingertips․ Ensuring you have the correct PDF manual downloaded is a fundamental step for proper use and troubleshooting․

Specific Stanley Charger Models and Manuals

Stanley provides specific manuals for its diverse battery charger models․ Notable examples include the BC50BS, BC15BS, BC25BS, and SXAE00025․ Each manual details features, operations, and safety for optimal use of its particular charger․

Stanley BC50BS 50 Amp Charger/Maintainer Manual

The Stanley BC50BS 50 Amp Charger/Maintainer Manual is an essential resource for all owners of this robust device․ This comprehensive document meticulously details safe and highly efficient operation, ensuring optimal performance from the outset․ It covers initial setup, including correct connection procedures for various battery types and chemistries․ The manual thoroughly explains the powerful 50 Amp rapid charging capability and the crucial maintainer function, designed for prolonged battery health․ Furthermore, it outlines essential safety warnings, critical precautions, and best practices for both proper usage and safe storage of the unit․ Technical specifications are clearly presented, offering vital insights into the charger’s output, input requirements, and compatible battery models․ The BC50BS manual also provides valuable troubleshooting tips for common operational issues, empowering users to effectively diagnose and resolve minor problems independently․ Detailed guidance on routine maintenance is included, specifically aimed at extending the lifespan of both the charger itself and the batteries it services․ Adhering strictly to the directives within this comprehensive manual guarantees optimal performance, maximizes efficiency, and truly preserves the longevity of your Stanley BC50BS unit, ensuring long-term reliability and satisfaction․

Stanley BC15BS 40 Amp Charger/Maintainer Manual

The Stanley BC15BS 40 Amp Charger/Maintainer Manual serves as the definitive guide for operating this versatile car battery charger․ This essential document provides comprehensive instructions to ensure efficient and reliable charging and maintenance of 12V batteries․ Users will find detailed information on connecting the charger correctly, understanding its various features, and utilizing its 40 Amp charging capacity for quick power restoration․ The manual emphasizes the importance of its maintainer function, crucial for extending battery life and keeping vehicles ready for use․ It outlines crucial safety precautions, warnings, and proper handling procedures to prevent accidents and ensure long-term device integrity․ Furthermore, the manual includes a clear description of the product, outlining its technical specifications and compatibility with different battery types․ Troubleshooting sections are integrated to assist users in resolving common operational issues, minimizing downtime․ Adherence to the guidelines within the Stanley BC15BS manual is paramount for maximizing the charger’s performance, ensuring user safety, and preserving the overall longevity of both the charger and the vehicle’s battery․ This makes it an indispensable tool for every owner․

Stanley BC15BS Charger Features and 12V Compatibility

The Stanley BC15BS charger is designed as a versatile and advanced car battery charger, specifically engineered for efficient and reliable charging of 12V batteries․ This broad 12-volt compatibility makes it an ideal solution for a wide array of applications, including standard automotive vehicles, marine vessels, and various power sport equipment․ A key feature of the BC15BS is its intelligent, fully automatic charging process․ This sophisticated system intuitively detects the connected battery’s type and current condition, then precisely adjusts charging parameters to deliver an optimized cycle, thereby preventing overcharging and extending battery lifespan․ Safety is paramount, with integrated robust protections against reverse polarity, short-circuits, and sparks, ensuring secure operation for the user․ Many BC15BS models incorporate diagnostic feedback through clear indicator lights or a digital display, providing instant insights into battery health and real-time charging progress․ Its maintainer mode is particularly beneficial for vehicles stored for extended periods, preserving the battery at its optimal charge without constant manual supervision․ The BC15BS represents a comprehensive, user-friendly, and dependable solution for effective 12-volt battery management, upholding Stanley’s commitment to quality and durability in its equipment offerings․

Stanley BC25BS Car Battery Charger Solution

The Stanley BC25BS charger provides a very reliable, efficient car battery charging solution․ It is explicitly designed for maintaining and rejuvenating various 12V lead-acid batteries: flooded, AGM, and gel types․ This makes it highly suitable for cars, trucks, and SUVs․ Its advanced, fully automatic, multi-stage charging intelligently assesses battery condition․ It precisely adjusts current and voltage for optimal charging, preventing undercharging or overcharging, thus significantly extending battery lifespan․ Safety is paramount: built-in protections guard against reverse polarity, short circuits, and overheating, ensuring secure operation․ Diagnostic indicators provide immediate feedback on charging status and battery health․ Crucially, its maintainer mode ensures batteries in stored vehicles remain fully charged and ready for use; The Stanley BC25BS delivers a comprehensive, dependable, user-friendly solution for effective automotive battery management․

Stanley SXAE00025 6/12V 4A Charger Manual Details

The comprehensive user manual for the STANLEY SXAE00025 6/12V 4A battery charger is an indispensable guide for its safe and effective operation․ This detailed document covers a wide array of essential information, beginning with crucial safety guidelines that users must adhere to before, during, and after operation to prevent accidents and ensure longevity of both the charger and the battery․ It meticulously describes the product itself, outlining its physical components, control panel layout, and various indicators․

Furthermore, the manual delves into the technical specifications of the SXAE00025, providing details on its input voltage, output voltage (6V and 12V), charging current (4A), and compatibility with different battery types like lead-acid, AGM, and gel․ It explains the charger’s intelligent multi-stage charging process, detailing how it optimizes the charge cycle based on the battery’s condition․ Instructions for switching between 6V and 12V modes are clearly articulated․ The manual also includes troubleshooting tips for common issues and warranty information, ensuring users have full support to put their tool into operation and maintain it properly․

Key Instructions and Safety Guidelines

For safe and effective use, always consult your Stanley battery charger manual․ Prioritize safety by carefully following all instructions․ Crucially, verify battery voltage against charger output, as detailed in your vehicle’s owner’s manual, before connecting․ Adherence ensures optimal performance and user protection․

Determining Battery Voltage and Charger Output

Determining battery voltage and matching it with your Stanley charger’s output is very paramount․ Before charging, always consult your vehicle’s owner’s manual to identify the battery’s voltage, typically 12V, though 6V is also possible․ This prevents damage and ensures effective, safe charging․

Next, verify your Stanley charger’s output voltage aligns․ Many chargers offer selectable settings; choose correctly․ A voltage mismatch leads to severe consequences: irreversible battery damage, inefficient charging (over or under), and harm to the charger itself․ An incorrect setting might cause battery failure or instability․

Always refer to your specific Stanley battery charger manual for detailed output capabilities and voltage selection instructions․ This crucial preliminary check guarantees a safe, efficient, and successful charging cycle, preserving battery lifespan and equipment integrity․ Neglecting this foundational step compromises safety and necessitates costly replacements․

manual for holmes humidifier

Welcome! This guide provides essential information for operating your Holmes humidifier, ensuring optimal performance and addressing common concerns.

Explore troubleshooting tips, filter replacement guidance, and warranty details for a seamless humidification experience.

Understanding the Benefits of Humidification

Optimal humidity levels offer significant health and comfort advantages. Dry air can exacerbate respiratory issues, leading to discomfort and increased susceptibility to illness. Humidification helps alleviate these symptoms by moisturizing nasal passages and throats, promoting easier breathing.

Beyond health, proper humidity protects your home’s structure and furnishings. Dry air can cause wood to crack and paint to peel. Maintaining ideal moisture levels preserves furniture, flooring, and even musical instruments.

Holmes humidifiers contribute to a more comfortable living environment, reducing static electricity and creating a sense of warmth, especially during colder months. Enjoy a healthier, more inviting home with balanced humidity!

Holmes Humidifier Models: A Quick Overview

Holmes offers a diverse range of humidifiers to suit various needs and room sizes. From cool mist options, ideal for safety around children and pets, to warm mist models providing soothing relief, there’s a Holmes humidifier for every preference.

The F7C046, a smart humidifier with Wemo integration, allows for convenient control via a mobile app and Wi-Fi connectivity. Traditional models like the HM1855 provide reliable, straightforward humidification.

Consider room size when selecting a model; larger spaces require humidifiers with greater output capacity. Explore available accessories, including replacement filters, readily available online or at local retailers, ensuring optimal performance and longevity.

Setting Up Your Holmes Humidifier

Begin by carefully following the instructions for filling the water tank and powering on your device. Proper setup ensures efficient and safe operation.

Filling the Water Tank

Proper water tank filling is crucial for optimal humidifier performance. Always disconnect the humidifier from the power outlet before filling or refilling the tank. Refer to your specific model’s diagram for tank removal instructions – some models have removable tanks, while others are top-fill.

Use cool, distilled water to minimize mineral buildup and prolong the life of your humidifier. Avoid using tap water, as it contains minerals that can create scale. Fill the tank to the indicated maximum fill line; overfilling can cause leaks.

Once filled, securely replace the tank, ensuring it’s properly seated. For models with multiple tanks, repeat the process for each. Consult the owner’s guide at www.holmesproducts.com for detailed instructions specific to your Holmes humidifier.

Powering On and Initial Operation

After filling the water tank, plug your Holmes humidifier into a grounded electrical outlet. Most models feature a power button to initiate operation. Some advanced models, like the F7C046 with Wemo, may require initial Wi-Fi connectivity setup via the mobile app – ensure you manually connect if needed.

Upon powering on, allow approximately 15-20 minutes for the wick or filter to become fully saturated and for visible mist to emit. Initial operation may take slightly longer.

Begin with a low humidity setting and gradually increase it to your desired comfort level. Refer to your owner’s guide for specific control panel instructions and recommended humidity levels.

Adjusting Humidity Levels

Holmes humidifiers offer various methods for adjusting humidity output. Many models feature dial controls or digital displays allowing precise selection of desired moisture levels – typically ranging from low to high. Start with a lower setting and monitor room humidity using a hygrometer for optimal comfort.

For smart models, like those with Wemo integration, humidity adjustments can be conveniently made through the mobile app, offering remote control and scheduling options.

Avoid setting humidity levels too high, as excessive moisture can promote mold growth. Aim for a range of 30-50% for a healthy indoor environment.

Maintaining Your Holmes Humidifier

Regular maintenance is key! Consistent cleaning, filter changes, and descaling prevent mineral buildup, ensuring efficient operation and prolonging your humidifier’s lifespan.

Regular Cleaning Procedures

Maintaining a clean humidifier is crucial for optimal performance and preventing the growth of bacteria and mold. Always disconnect the humidifier from power before cleaning. Empty any remaining water from the tank and base.

Use a mild detergent and warm water to gently clean the tank, base, and mist outlet. Avoid harsh chemicals or abrasive cleaners. Rinse thoroughly to remove all soap residue. For hard water buildup, a descaling solution (vinegar and water mixture) can be used, following the manufacturer’s instructions.

Wipe down the exterior with a damp cloth. Allow all parts to air dry completely before reassembling and using the humidifier. Regular cleaning, ideally weekly, will ensure fresh and healthy air.

Filter Replacement Guide

Your Holmes humidifier’s filter plays a vital role in removing impurities from the water and air. Regular filter replacement ensures optimal performance and air quality. The frequency depends on usage and water hardness, but generally, replace the filter every 1-3 months.

To replace the filter, first, disconnect the humidifier. Locate the filter access panel – consult your owner’s manual for specific instructions; Remove the old filter and discard it. Insert the new filter, ensuring it’s properly seated.

Replacement filters can be purchased at local retailers or directly from Holmesproducts.com. Contact consumer service at 1-800-546-5637 for assistance locating the correct filter for your model.

Descaling to Prevent Mineral Buildup

Mineral buildup from hard water can reduce your Holmes humidifier’s efficiency and lifespan. Descaling removes these deposits, ensuring optimal performance. Regularly inspect the water tank and humidifier components for white, chalky residue.

To descale, unplug the humidifier. Prepare a descaling solution using white vinegar and water (refer to your owner’s manual for the correct ratio). Fill the tank with the solution and run the humidifier for a specified period – typically 30-60 minutes.

Afterward, empty the tank and rinse thoroughly with clean water before refilling and resuming normal operation. Consistent descaling maintains humidifier health.

Troubleshooting Common Issues

Encountering problems? This section offers solutions for issues like the humidifier not turning on, low mist output, or unusual noises during operation.

Humidifier Not Turning On

Is your Holmes humidifier failing to power on? First, ensure the unit is securely plugged into a functioning electrical outlet. Verify the outlet is receiving power by testing it with another device.

Next, double-check that the water tank is properly seated and filled to the minimum water level – some models won’t operate without sufficient water. If the issue persists, consult the owner’s guide for specific reset instructions or troubleshooting steps related to your model (HM5082, HM1855, etc.).

For smart models (F7C046), confirm Wi-Fi connectivity isn’t interfering with operation. If problems continue, contact Holmes customer service at 1-800-546-5637 for further assistance.

Low or No Mist Output

Experiencing reduced or absent mist from your Holmes humidifier? Begin by verifying the fan is operating; if not, consult the “Humidifier Not Turning On” section. Ensure the water tank is adequately filled, as low water levels restrict mist production.

A clogged filter is a common culprit – check and replace the filter according to the replacement guide. Mineral buildup can also hinder performance; descaling the unit regularly is crucial. Refer to your owner’s manual for descaling instructions.

For smart models, ensure settings aren’t limiting mist output. If issues persist, contact Holmes customer service for model-specific guidance and potential repair options.

Unusual Noises During Operation

Hearing strange sounds from your Holmes humidifier? First, ensure the unit is placed on a level surface to minimize vibrations. Check the water tank is correctly seated and isn’t rattling. A low water level can sometimes cause gurgling sounds – refill the tank.

If the noise persists, inspect the fan blade for obstructions or damage. A malfunctioning motor might be the cause; if you suspect this, contact Holmes customer service as motor replacement may be necessary.

Regular cleaning, as outlined in the maintenance section, can prevent buildup that contributes to noise. Always unplug the unit before inspecting internal components.

Connectivity and Smart Features (If Applicable)

For Wemo-enabled models, connect via Wi-Fi using the app settings. Manual connection may be needed; reopen the app to establish control;

Connecting to Wi-Fi

Establishing a Wi-Fi connection allows for remote control and smart features on compatible Holmes humidifiers; Begin by ensuring your humidifier is powered on and within range of your Wi-Fi network. Open the Holmes Smart app and navigate to the device settings.

Select “Connect to Wi-Fi” and follow the on-screen prompts. You may need to manually select your network and enter your password. If the connection fails, try reopening the app or revisiting the settings.

Ensure your Wi-Fi network is 2.4 GHz, as some models may not support 5 GHz. A stable internet connection is crucial for optimal performance. Refer to the app’s help section for further assistance;

Using the Mobile App

The Holmes Smart app provides convenient control over your humidifier’s settings. Once connected to Wi-Fi, you can adjust humidity levels, set schedules, and monitor water levels remotely. The app interface displays real-time information about your humidifier’s operation.

Explore features like timer settings to automatically turn the humidifier on or off. You can also receive notifications regarding filter replacement or low water levels.

Customize your humidification experience based on your preferences and needs. The app offers a user-friendly design for easy navigation and control. Regularly check for app updates to ensure optimal functionality.

Troubleshooting Connectivity Problems

Experiencing connection issues? First, ensure your Wi-Fi network is functioning correctly and your humidifier is within range. Try restarting both your router and the humidifier. Within the Holmes Smart app, navigate to settings and attempt to manually reconnect to the device.

Verify that you’ve entered the correct Wi-Fi password. If problems persist, temporarily disable any firewall settings that might be blocking the connection.

Check for app updates, as these often include bug fixes addressing connectivity issues. If all else fails, consult the Belkin support resources or contact Holmes customer service for further assistance.

Safety Precautions

Important safety guidelines: Never place the humidifier near heat sources or under rugs. Avoid operating with a damaged cord, and always unplug before cleaning.

Proper Placement of the Humidifier

Optimal positioning is crucial for safe and effective operation. Place your Holmes humidifier on a flat, level surface, away from walls and furniture to allow for adequate mist distribution. Avoid locating it near heat sources like stoves or radiators, as this can affect performance and potentially create a hazard.

Never place the humidifier on carpeting or rugs, and ensure the cord isn’t a tripping hazard or positioned under furniture. Keep it out of reach of children and pets. Proper airflow around the unit is essential; avoid enclosed spaces. Regularly inspect the surrounding area for moisture buildup, adjusting placement if necessary to prevent damage.

Electrical Safety Guidelines

Prioritize safety when operating your Holmes humidifier. Always ensure the voltage indicated on the appliance matches your household supply. Never operate the humidifier with a damaged cord or plug; if damaged, discontinue use immediately and contact customer service.

Do not use extension cords. Unplug the humidifier before filling, cleaning, or changing filters. Avoid operating the humidifier in damp environments like bathrooms. Never attempt to disassemble or repair the unit yourself; refer to qualified personnel for any repairs. Keep the humidifier away from water sources to prevent electrical shock. Always follow these guidelines to ensure safe operation.

Warranty Information and Customer Support

Holmes offers a warranty on their humidifiers; details are included with your product. For assistance, visit www.holmesproducts.com or call 1-800-546-5637.

Understanding Your Warranty

Your Holmes humidifier is covered by a limited warranty against defects in materials and workmanship. The warranty period varies depending on the specific model, so please retain your proof of purchase to determine your coverage duration.

Generally, the warranty covers repair or replacement of defective parts, but it does not cover damage resulting from misuse, accidents, or unauthorized repairs. It’s crucial to operate and maintain the humidifier according to the instructions in this manual to keep the warranty valid.

The warranty doesn’t typically cover consumable parts like filters, which are expected to be replaced regularly. For complete warranty details and claim procedures, please refer to the documentation included with your product or visit the Holmes website at www.holmesproducts.com.

Contacting Holmes Customer Service

Need assistance with your Holmes humidifier? Our dedicated customer service team is here to help! For quick answers to frequently asked questions, visit the Belkin Official Support page specifically for Holmes Smart Humidifiers (F7C046).

If you require more personalized support, you can reach Holmes Consumer Service directly by calling 1-800-546-5637. Be prepared to provide your model number and date of purchase for efficient assistance.

Alternatively, you can find helpful resources, troubleshooting guides, and replacement part information on the official Holmes Products website: www.holmesproducts.com. Don’t hesitate to reach out – we’re committed to ensuring your satisfaction!

Replacement Parts and Accessories

Keep your humidifier running smoothly! Find replacement filters at local retailers or online at www.holmesproducts.com. Additional accessories are also available.

Where to Purchase Replacement Filters

Maintaining optimal performance requires regular filter replacement for your Holmes humidifier. Fortunately, obtaining new filters is convenient and accessible through several channels. You can easily find replacement filters at many local retailers that carry Holmes products, offering a quick and straightforward solution.

Alternatively, for a wider selection and the convenience of shopping from home, visit the official Holmes website at www.holmesproducts.com. There, you can directly purchase the correct filter for your specific model. Don’t hesitate to call consumer service at 1-800-546-5637 if you need assistance identifying the right filter or have any questions about the process.

Other Available Accessories

Enhance your humidification experience with a range of accessories designed for your Holmes humidifier. While filter replacement is crucial, consider exploring options to optimize performance and convenience. Though specific accessories vary by model, common additions include descaling solutions to prevent mineral buildup and maintain efficient operation.

Check the Holmes website (www.holmesproducts.com) or your local retailer for a complete catalog of compatible accessories. These additions can extend the life of your humidifier and ensure consistently clean, healthy air. Remember to consult your owner’s guide (HM5082) for recommendations tailored to your particular Holmes humidifier model for the best results.

harley service manual pdf

Understanding Harley Service Manuals in PDF Format

Harley service manuals in PDF format offer convenient access to crucial repair information, streamlining maintenance for enthusiasts and professionals alike, as of December 18, 2025.

What is a Harley Service Manual?

A Harley Service Manual is a comprehensive, detailed guide created by Harley-Davidson specifically for servicing and repairing their motorcycles. These manuals aren’t simply repair instructions; they are the official documentation used by Harley-Davidson technicians. They contain exploded diagrams, torque specifications, troubleshooting procedures, and detailed step-by-step instructions covering every aspect of the motorcycle – from basic maintenance like oil changes to complex overhauls of the engine and transmission.

Essentially, it’s the bible for anyone working on a Harley-Davidson. The information within ensures repairs are done correctly, maintaining the motorcycle’s performance and safety. A Harley service manual PDF version simply delivers this vital information in a digital, easily accessible format, as of December 18, 2025.

Why Use a PDF Version?

PDF versions of Harley service manuals offer significant advantages over traditional printed copies. Portability is key – you can access the manual on a laptop, tablet, or smartphone, making it ideal for working in the garage or on the road. Harley service manual PDFs are searchable, allowing you to quickly locate specific information without flipping through pages.

They also eliminate the risk of damage to a physical book, like oil stains or torn pages. Zoom functionality enhances readability, and the ability to print specific sections saves paper and cost. Furthermore, digital copies are often more readily available and can be instantly downloaded, as of December 18, 2025.

Finding Harley Service Manuals Online

Harley service manual PDFs are discoverable through the official Harley-Davidson website, third-party retailers, and various online marketplaces, as of December 18, 2025.

Official Harley-Davidson Website

The official Harley-Davidson website represents the most reliable source for authentic Harley service manual PDFs. Here, you’ll find manuals specifically tailored to your motorcycle’s year and model, ensuring accuracy and comprehensive coverage. While often requiring a purchase, these manuals guarantee genuine Harley-Davidson documentation, free from potential errors or omissions found in unofficial sources.

Accessing these manuals typically involves navigating to the “Service & Parts” section of the website, followed by selecting your motorcycle’s specific details. Digital downloads offer immediate access, eliminating shipping delays. Remember to verify compatibility with your exact model year before purchasing, as variations exist. The official source provides peace of mind knowing you’re working with the manufacturer’s recommended procedures, as of December 18, 2025.

Third-Party Retailers & Online Marketplaces

Numerous third-party retailers and online marketplaces, such as eBay and Amazon, offer Harley service manual PDFs. These platforms often present a wider selection of years and models, potentially including out-of-print manuals unavailable directly from Harley-Davidson. However, exercising caution is crucial. Thoroughly review seller ratings and descriptions to ensure authenticity and PDF quality.

Prices can vary significantly, offering potential cost savings, but always compare against the official Harley-Davidson pricing. Verify the manual covers your specific motorcycle’s year, model, and engine configuration. Be wary of excessively low prices, which may indicate a compromised or incomplete PDF. As of December 18, 2025, diligent research is key to a successful purchase.

Free Online Resources (Caution Advised)

While free online resources offering Harley service manual PDFs exist, approaching them with extreme caution is vital. These sources often host incomplete, inaccurate, or outdated information, potentially leading to improper repairs and safety hazards. Copyright infringement is also a significant concern, as distributing copyrighted manuals without authorization is illegal.

Furthermore, free PDFs may contain malware or viruses. Always scan downloaded files with reputable antivirus software. Consider these resources as a last resort and cross-reference information with official sources whenever possible. As of December 18, 2025, prioritizing safety and legality outweighs the appeal of free manuals.

Harley Service Manual Content Breakdown

Harley service manual PDFs comprehensively detail engine repair, electrical diagnostics, chassis adjustments, and bodywork procedures, ensuring thorough maintenance and restoration as of today.

Engine & Drivetrain

Harley service manual PDFs dedicate substantial sections to engine and drivetrain components. These detailed guides cover complete disassembly and reassembly procedures, specifying torque values for every bolt and fastener. You’ll find in-depth explanations of the combustion cycle, fuel injection systems, and ignition timing.

Troubleshooting guides pinpoint common engine issues, like oil leaks or compression loss, offering diagnostic steps and repair solutions. Drivetrain coverage includes transmissions, clutches, and final drive components, detailing bearing adjustments, gear inspections, and chain/belt maintenance. Diagrams and exploded views illustrate complex assemblies, while parts lists ensure accurate component identification and ordering. These sections are vital for both routine maintenance and major overhauls, empowering owners and mechanics to keep their Harley running smoothly.

Electrical System

Harley service manual PDFs provide comprehensive coverage of the motorcycle’s electrical system. Detailed wiring diagrams are a cornerstone, illustrating circuit paths and component locations for easy troubleshooting. Sections cover the charging system – alternator, regulator, and battery – detailing testing procedures and repair steps.

Ignition system diagnostics, including coil, spark plug, and sensor testing, are thoroughly explained. Lighting systems, instrumentation, and accessory wiring are also addressed. Manuals often include troubleshooting flowcharts to pinpoint electrical faults efficiently. Understanding these systems is crucial for diagnosing issues like starting problems, dim lights, or malfunctioning gauges, ensuring safe and reliable operation of the motorcycle’s electrical components.

Chassis & Suspension

Harley service manual PDFs dedicate significant sections to the chassis and suspension systems. These manuals detail procedures for disassembling, inspecting, and reassembling the front forks, including oil changes and seal replacements. Rear suspension service, covering shocks and air suspension (if equipped), is also thoroughly documented.

Wheel bearing service, tire changes, and brake system overhaul – calipers, rotors, and lines – are explained with detailed illustrations. Frame inspection procedures, checking for cracks or damage, are crucial for safety. Alignment specifications and adjustment techniques are provided, ensuring optimal handling and stability. Proper chassis and suspension maintenance, guided by the manual, enhances ride quality and control.

Body & Controls

Harley service manual PDFs provide comprehensive guidance on bodywork and control systems. Detailed instructions cover the removal and installation of fairings, fenders, and fuel tanks, alongside paint care and repair techniques. Control cable adjustments – throttle, clutch, and brakes – are clearly outlined for precise operation.

The manuals also detail handlebar replacement, switchgear servicing, and instrument cluster troubleshooting. Lighting system repair, including headlights, turn signals, and taillights, is thoroughly explained. Seat removal and installation, along with associated component servicing, are also included. Proper attention to these details, guided by the PDF, ensures both aesthetic appeal and functional safety.

Navigating a Harley Service Manual PDF

Harley service manual PDFs are easily navigable using search functions, bookmarks, and tables of contents, allowing quick access to specific repair procedures and diagrams.

Using Search Functionality

The search functionality within a Harley service manual PDF is an invaluable tool for quickly locating specific information. Instead of manually flipping through hundreds of pages, users can input keywords – such as “carburetor adjustment,” “primary chain tension,” or a specific part number – to instantly pinpoint relevant sections.

Effective searching relies on using precise terms. Experiment with different phrasing and variations of keywords to broaden or narrow your results. Most PDF readers allow for case-insensitive searches, meaning capitalization doesn’t matter. Advanced search options, if available, can refine searches further by specifying whole words only or searching within a specific date range (if the manual has been updated). Mastering this skill dramatically reduces troubleshooting time and enhances the overall repair experience.

Bookmarks & Table of Contents

Harley service manual PDFs typically include a detailed table of contents and, ideally, a robust bookmarking system. The table of contents provides a hierarchical overview of the manual’s structure, allowing users to quickly navigate to major sections like engine repair, electrical diagnostics, or chassis adjustments.

Bookmarks, often pre-set by the manual’s creator, offer direct access to specific topics within those sections. Users can also create custom bookmarks to save frequently accessed pages for even faster retrieval. Utilizing both features significantly improves navigation, especially in lengthy manuals. A well-organized PDF with comprehensive bookmarks transforms a potentially daunting repair task into a more manageable process.

Zooming & Printing

Harley service manual PDFs offer essential viewing and output options. Zoom functionality is crucial for detailed diagrams and small text, allowing users to enlarge sections for clarity during repairs. Most PDF readers support various zoom levels, ensuring comfortable viewing on different screen sizes.

Printing capabilities are equally important, enabling a hard copy for workshop use, free from screen glare or potential device failures. Ensure print settings are adjusted for optimal readability, potentially scaling the document to fit standard paper sizes. High-quality printing preserves diagram detail, aiding accurate repairs and diagnostics.

Specific Harley Models & Manual Availability

PDF service manuals vary by Harley model; Sportster, Touring, and V-Rod manuals are commonly available, though older or rare models may present challenges.

Sportster Service Manuals

Harley-Davidson Sportster service manuals, frequently available in PDF format, cover a wide range of years and models, from the classic Ironhead to the modern Revolution engine. These manuals are invaluable for owners undertaking their own maintenance and repairs, providing detailed instructions, exploded diagrams, and torque specifications. Finding a Sportster-specific manual ensures accurate guidance for your particular year and engine configuration.

PDF versions offer portability and ease of use, allowing access on laptops, tablets, or smartphones. Common repair areas covered include engine rebuilds, carburetor tuning, electrical troubleshooting, and suspension adjustments. When sourcing a Sportster manual, verifying the model year and engine type is crucial to avoid incorrect information. Numerous online retailers and the official Harley-Davidson website offer these essential resources.

Touring (Road Glide, Street Glide) Manuals

Harley-Davidson Touring models, like the Road Glide and Street Glide, demand comprehensive service manuals, often best accessed in PDF format due to their extensive systems. These manuals detail complex procedures for maintaining features like infotainment systems, ABS brakes, and electronically controlled suspension. PDF accessibility allows technicians and owners to easily reference diagrams and troubleshooting guides while working on these sophisticated machines.

Specific manuals cater to each model year, accounting for updates and changes in components. Common repair sections include fuel injection diagnostics, fairing removal, and electrical system repairs. Ensuring the manual matches your bike’s year is vital for accurate information. Online marketplaces and Harley-Davidson’s official site are reliable sources for these crucial PDFs.

V-Rod Service Manuals

V-Rod service manuals, readily available in PDF format, are essential for maintaining these performance-focused Harley-Davidson motorcycles. The V-Rod’s unique engine and chassis require specialized knowledge, making a detailed manual indispensable. These PDFs cover everything from routine maintenance like oil changes and brake servicing to more complex repairs involving the liquid-cooled Revolution engine and its fuel injection system.

PDF versions offer convenient access to detailed diagrams and troubleshooting steps. Locating the correct manual for your specific V-Rod year is crucial, as components and procedures varied across production runs. Authorized dealers and reputable online retailers are good sources for authentic V-Rod service manuals in PDF format.

Troubleshooting Common Issues with Manuals

Common PDF issues include corruption, incorrect model years, or difficulty locating specific information; verifying file integrity and model compatibility is essential for successful repairs.

Corrupted PDF Files

Encountering a corrupted Harley service manual PDF can be incredibly frustrating, hindering your ability to access vital repair information. Several factors can contribute to this issue, ranging from incomplete downloads to errors during file transfer or storage. Symptoms often include garbled text, missing pages, or the inability to open the file altogether.

First, attempt re-downloading the manual from the original source, ensuring a stable internet connection throughout the process. If the problem persists, try opening the PDF with a different PDF reader, such as Adobe Acrobat Reader or a web browser. Utilizing a PDF repair tool might also restore functionality, though success isn’t guaranteed. Always scan downloaded files with antivirus software to rule out malware as a potential cause of corruption. If all else fails, contacting the manual provider for a replacement copy is recommended.

Incorrect Model Year

Using a Harley service manual PDF for the wrong model year is a common, yet potentially damaging, mistake. Harley-Davidson frequently implements changes to components and procedures, even within the same model line. Applying instructions from an incorrect year can lead to improper repairs, safety hazards, and further mechanical issues.

Always meticulously verify that the PDF manual corresponds precisely to your motorcycle’s year, make, and model. Pay close attention to the publication date listed within the manual itself. Cross-reference this information with your motorcycle’s Vehicle Identification Number (VIN) to ensure compatibility. If uncertainty remains, consult with a Harley-Davidson dealership or experienced mechanic before proceeding with any repairs; Utilizing the correct manual is paramount for successful and safe maintenance.

Difficulty Finding Specific Information

Navigating a Harley service manual PDF, even with search functionality, can sometimes prove challenging. These manuals are often extensive, containing detailed diagrams and technical jargon. Locating the precise information needed for a specific repair might require patience and a strategic approach.

Utilize keyword combinations relevant to your issue when searching. Explore the table of contents and bookmarks for broader topic areas. Don’t hesitate to consult online Harley-Davidson forums or communities; other enthusiasts may have encountered similar difficulties and can offer guidance. Remember that understanding basic motorcycle mechanics terminology will significantly improve your search efficiency and comprehension of the manual’s content.

Legal Considerations & Copyright

Respecting copyright is vital when using Harley service manual PDFs; unauthorized copies pose legal risks and may lack accuracy, as of today’s date.

Authorized vs. Unauthorized Manuals

Distinguishing between authorized and unauthorized Harley-Davidson service manual PDFs is crucial for several reasons. Official manuals, directly from Harley-Davidson or licensed retailers, guarantee accuracy, completeness, and adherence to safety standards. They are created by the manufacturer, ensuring the information aligns with specific model years and configurations.

Unauthorized manuals, often found on free online resources, may contain errors, omissions, or outdated information, potentially leading to improper repairs and safety hazards. Furthermore, downloading or distributing unauthorized PDFs constitutes copyright infringement, carrying legal consequences. Always prioritize legitimate sources to protect yourself, your motorcycle, and avoid legal issues when working on your Harley-Davidson.

Copyright Infringement Risks

Downloading or sharing Harley-Davidson service manual PDFs from unauthorized sources carries significant copyright infringement risks. Harley-Davidson holds exclusive rights to its technical documentation, and unauthorized distribution violates these protections. Individuals engaging in such activities could face legal action, including substantial fines and potential lawsuits from Harley-Davidson or its legal representatives.

Even possessing a pirated PDF for personal use can be considered a copyright violation. Supporting legitimate channels for acquiring manuals – the official Harley-Davidson website or authorized retailers – ensures compliance with copyright law and supports the manufacturer’s intellectual property rights. Prioritize legal access to safeguard yourself from potential penalties;

Tools & Software for Working with PDFs

Adobe Acrobat Reader and various PDF editors are essential for viewing, annotating, and printing Harley service manual PDFs effectively and efficiently.

Adobe Acrobat Reader

Adobe Acrobat Reader stands as the cornerstone for accessing and interacting with Harley-Davidson service manual PDFs. This free software provides fundamental functionalities like viewing, searching, and printing these essential documents. Its widespread availability and compatibility across various operating systems make it a universally accessible choice for Harley owners and mechanics.

Beyond basic viewing, Acrobat Reader allows for zooming in on detailed diagrams within the manuals, crucial for intricate repair procedures. The search function is invaluable for quickly locating specific components or troubleshooting steps. While offering robust features for free, users requiring advanced editing or annotation capabilities may explore paid Adobe Acrobat versions. However, for simply navigating and utilizing a Harley service manual PDF, the Reader is often sufficient and highly recommended.

PDF Editors (Paid Options)

For advanced manipulation of Harley-Davidson service manual PDFs, paid PDF editors offer functionalities beyond basic viewing. Programs like Adobe Acrobat Pro, Nitro PDF, and Foxit PDF Editor enable users to edit text, add annotations, combine multiple files, and even create fillable forms – useful for tracking maintenance records.

These tools are particularly beneficial for mechanics or serious enthusiasts who frequently reference and modify service manuals. They allow for highlighting key information, adding personal notes, or redacting sensitive data. While a free reader suffices for simple tasks, a paid editor unlocks a higher level of control and customization when working with complex Harley documentation, enhancing efficiency and organization.

canon ae 1 program manual

Welcome to the Canon AE-1 Program Manual, your comprehensive guide to mastering this iconic 35mm film SLR camera․ Explore its features, modes, and troubleshooting tips to enhance your photography experience․

Overview of the Canon AE-1 Program Camera

The Canon AE-1 Program is a legendary 35mm film SLR camera released in 1976, renowned for its durability and versatility․ It combines manual controls with advanced automatic features, making it accessible to both professionals and enthusiasts․ The camera features a robust design, a bright viewfinder, and a reliable metering system․ With its aperture priority mode, manual focus, and compatibility with Canon FD lenses, the AE-1 Program offers creative control and precision․ Its compact size and intuitive interface have made it a favorite among photographers․ This camera is a timeless choice for capturing high-quality images, blending tradition with innovation․

Importance of the Manual for Effective Camera Use

The Canon AE-1 Program manual is essential for unlocking the camera’s full potential․ It provides detailed guidance on operating modes, including Program, Shutter Priority, and Aperture Priority, ensuring users can harness its versatility․ The manual explains the camera’s metering system, lens compatibility, and advanced features like multi-exposure․ Troubleshooting sections help resolve common issues, while maintenance tips prolong the camera’s lifespan․ Available in multiple languages, including Russian and Spanish, the manual caters to a global audience․ Whether you’re a novice or an experienced photographer, the manual serves as an indispensable resource for mastering the AE-1 Program’s capabilities and achieving exceptional results in film photography․

Key Features of the Canon AE-1 Program

The Canon AE-1 Program offers a durable design, advanced viewfinder with metering, versatile shutter and aperture controls, and multiple shooting modes for enhanced photography experiences․

Design and Build Quality

The Canon AE-1 Program boasts a robust and ergonomic design, featuring a black body with a textured grip for secure handling․ Its compact size and lightweight construction make it portable, while the use of high-quality materials ensures durability․ The camera’s build is resistant to minor wear and tear, making it a reliable choice for both casual and professional photographers․ The intuitive layout of controls, including the mode dial and shutter button, enhances user experience․ Additionally, the camera’s design supports compatibility with a wide range of Canon FD lenses, offering flexibility for various photography needs․ Its timeless aesthetic and solid craftsmanship have made it a favorite among film photography enthusiasts․

Viewfinder and Metering System

The Canon AE-1 Program features a bright, fixed pentaprism viewfinder with 97% coverage, providing an accurate preview of your frame․ It includes a microprism spot and split-image focusing aid for precise manual focusing․ The viewfinder also displays LED meter needles for exposure information, flash ready indication, and battery check․ The camera’s metering system is center-weighted, ensuring balanced exposures by prioritizing the central area of the frame․ For accurate metering, the AE-1 Program requires the use of Canon FD lenses․ The combination of a clear viewfinder and reliable metering system makes it easier to achieve professional-quality results, even in challenging lighting conditions․ This design ensures both convenience and precision for photographers of all skill levels․

Shutter Speed and Aperture Control

The Canon AE-1 Program offers precise control over shutter speed and aperture, enabling photographers to achieve desired creative effects․ The camera features a vertical-travel, electronically controlled focal-plane shutter with speeds ranging from 2 seconds to 1/1000th of a second․ The aperture can be adjusted manually or automatically, depending on the mode, and is compatible with Canon FD lenses․ A unique feature is the ability to set the aperture to “A” for automatic control in Program and Shutter Priority modes․ The LED display in the viewfinder provides clear feedback on selected settings․ This system ensures flexibility and accuracy, allowing photographers to balance exposure while maintaining creative control over their images․

Operation Modes of the Canon AE-1 Program

The Canon AE-1 Program features three main operation modes: Program mode for automatic shooting, Shutter Priority for manual shutter control, and Aperture Priority for creative depth-of-field adjustments․

Program Mode for Automatic Shooting

The Program mode on the Canon AE-1 offers effortless photography by automatically adjusting shutter speed and aperture for optimal exposure․ Simply attach a Canon FD lens, set it to the “A” position, and the camera will handle the rest․ This mode is ideal for beginners or those who want to focus on composition without manual adjustments․ The AE-1 Program ensures balanced exposures, making it perfect for everyday shooting․ Its ease of use and reliability make it a favorite among photographers seeking convenience without compromising image quality․ This mode is a testament to the camera’s innovative design and user-friendly approach to photography․

Shutter Priority Mode for Manual Control

In Shutter Priority mode, photographers can manually set the shutter speed, allowing for precise control over motion capture and creative effects․ The camera automatically adjusts the aperture to ensure proper exposure․ This mode is ideal for freezing fast-moving subjects or creating artistic blur in low-light conditions․ With a Canon FD lens, users can easily dial in their desired shutter speed, ranging from 1/1000th of a second to 8 seconds․ The AE-1 Program’s electronic shutter system ensures accurate and consistent results․ This mode is perfect for photographers who want to balance creativity with the convenience of automatic aperture adjustment, making it a versatile tool for various shooting scenarios․

Aperture Priority Mode for Creative Photography

Aperture Priority mode offers photographers control over the lens aperture, enabling creative depth-of-field effects; By manually setting the aperture, users can isolate subjects or capture wide landscapes with clarity․ The camera automatically adjusts the shutter speed to maintain optimal exposure․ This mode is particularly useful for portrait and landscape photography, where depth of field is crucial․ With Canon FD lenses, photographers can achieve precise control over light entry and focus․ The AE-1 Program’s metering system ensures accurate exposures, making it an ideal choice for creative photography․ This mode empowers users to experiment with artistic compositions while relying on the camera’s automatic features for technical precision․

Using the Canon AE-1 Program Manual

This section guides you through effectively using the Canon AE-1 Program Manual, helping you understand controls, troubleshoot issues, and master advanced techniques for optimal photography results․

Navigating the Manual for Beginners

Navigating the Canon AE-1 Program Manual is straightforward, even for newcomers․ Start with the table of contents to identify key sections, such as basic camera controls, shooting modes, and troubleshooting․ Begin with the “Understanding the Camera’s Controls and Functions” section to familiarize yourself with the camera’s layout and operation․ Pay attention to diagrams and illustrations, which provide visual guidance for setting up and using the camera․ For beginners, focus on the “Program Mode” and “Aperture Priority Mode” sections to learn automatic and semi-automatic shooting techniques․ The manual also offers practical examples and tips to help you master the camera step by step, ensuring a smooth transition from novice to confident photographer․

Understanding the Camera’s Controls and Functions

The Canon AE-1 Program Manual provides detailed insights into the camera’s controls and functions․ Start by familiarizing yourself with the ergonomic design, featuring the mode dial, shutter speed dial, and aperture ring․ The viewfinder displays essential shooting information, such as aperture, shutter speed, and metering data․ Use the ASA/ISO dial to set film sensitivity․ The manual also explains the role of the lens mount and how to attach FD-series lenses․ Understand the metering system, which offers precise light measurement for accurate exposures․ Additional controls like the self-timer and mirror lock-up are explained to help you master advanced techniques․ Grasp these fundamentals to unlock the camera’s full potential and enhance your photography skills․

Troubleshooting Common Issues

The Canon AE-1 Program Manual includes a section dedicated to troubleshooting common issues․ If the camera fails to operate, check the battery condition and ensure all controls are set correctly․ For inaccurate metering, clean the light-sensitive areas with a soft cloth․ If the shutter doesn’t fire, verify the film is loaded properly and the mirror lock-up is not engaged․ Lens issues often arise from improper attachment; ensure the FD lens clicks securely into place․ For persistent problems, refer to the manual’s diagnostic guide or consult a professional technician․ Regular maintenance, such as cleaning and proper storage, can prevent many of these issues․ Troubleshooting ensures optimal performance and extends the camera’s lifespan․

Advanced Techniques with the Canon AE-1 Program

Explore advanced techniques like manual focus, flash photography, and multi-exposure to unlock creative potential with the Canon AE-1 Program․

Mastering Manual Focus for Precision

Mastering manual focus on the Canon AE-1 Program enhances precision in your photography․ Use the rotating focus ring on compatible FD lenses to achieve sharp images․ Ensure the lens is set to manual mode by aligning the A mark․ Utilize the viewfinder’s microprism and split-image focusing aids for accurate adjustments․ Practice with stationary subjects first, then experiment with moving objects for dynamic results․ Steady your hands or use a tripod to minimize blur․ Manual focus allows creative control over depth of field and selective focus effects, making it a powerful tool for artistic expression with the AE-1 Program․

Using Flash and External Accessories

The Canon AE-1 Program supports various flash units via its hot shoe and PC terminal․ For dedicated flash, use the A-TTL mode, which automatically adjusts exposure․ With non-dedicated units, set the flash sync speed to 1/60 sec manually․ The camera also works with external strobes using the PC terminal․ Ensure the flash is compatible with the AE-1’s sync speed for optimal results․ External accessories like remote triggers and flash adapters can enhance versatility․ Always refer to the manual for specific settings and compatibility guidelines to maximize your flash photography capabilities with the AE-1 Program․

Multi-Exposure and Creative Shooting Modes

The Canon AE-1 Program offers multi-exposure capabilities, allowing photographers to capture multiple images on a single frame for artistic effects․ To activate this mode, set the film advance to the “multiple exposure” position and adjust the exposure compensation as needed․ This feature is ideal for creating layered compositions or experimenting with abstract imagery․ Additionally, the camera supports creative shooting modes like long exposures and bulb mode, enabling photographers to capture light trails or artistic blurs․ For best results, use a tripod to maintain stability during multi-exposure and long exposure shots․ These modes unlock new creative possibilities, making the AE-1 Program a versatile tool for both beginners and advanced photographers․

Maintenance and Care of the Canon AE-1 Program

Regular maintenance ensures optimal performance of your Canon AE-1 Program․ Clean the lens and camera body with soft materials, store properly in a dry place, and handle with care․ These practices prevent damage and ensure long-term reliability and image quality․

Cleaning the Camera and Lens

Cleaning your Canon AE-1 Program camera and lens is essential for maintaining image quality․ Use a soft, dry microfiber cloth to wipe the camera body and viewfinder․ For the lens, gently remove dust with a brush or soft tissue․ Avoid touching the mirror or shutter mechanism to prevent damage․ When necessary, use lens cleaning tissue with a few drops of lens cleaning solution․ Never use harsh chemicals or abrasive materials, as they may scratch the surfaces․ Regular cleaning prevents dust and smudges from affecting your photos․ Proper care ensures your camera remains in excellent condition for years of reliable use․

Storing the Camera Properly

To maintain the Canon AE-1 Program’s condition, store it in a cool, dry place away from direct sunlight․ Use a protective case or pouch to shield it from dust and physical damage․ Avoid humid environments, as moisture can harm electrical components and encourage mold growth․ Consider using silica gel packets to absorb any residual moisture․ Store the camera with the lens cap on to protect the lens from dust and scratches․ If not using the camera for an extended period, remove the battery to prevent corrosion․ Proper storage ensures your Canon AE-1 Program remains functional and ready for future use, preserving its longevity and performance․

Upgrading or Repairing the Camera

Upgrading or repairing the Canon AE-1 Program requires careful consideration to maintain its functionality and value․ For repairs, consult a professional technician experienced with film cameras to ensure proper handling of its mechanical and electronic components․ Upgrades may include replacing the original battery with a compatible alternative or adding a motor drive for faster shooting․ Always use genuine or high-quality parts to avoid damaging the camera․ DIY repairs are not recommended due to the camera’s intricate design․ Regular maintenance, such as cleaning and lubricating moving parts, can prevent issues and extend its lifespan, keeping your Canon AE-1 Program in excellent working condition for years to come․

The Canon AE-1 Program Manual is a comprehensive guide to unlocking your camera’s full potential․ With its detailed instructions and troubleshooting tips, it empowers photographers to master this iconic SLR․ By following the manual, users can enhance their shooting experience, explore creative modes, and maintain their camera effectively․ Whether you’re a beginner or an advanced photographer, this manual serves as an invaluable resource to help you achieve exceptional results with the Canon AE-1 Program․

Final Thoughts on the Canon AE-1 Program Manual

The Canon AE-1 Program Manual is an essential resource for photographers seeking to maximize their use of this iconic camera․ It provides detailed insights into the camera’s features, operation modes, and maintenance, ensuring a comprehensive understanding for both beginners and advanced users․ The manual’s clarity and accessibility have made it a valuable tool for photographers worldwide, contributing to the camera’s enduring popularity․ By following the guidelines outlined, users can unlock the full potential of the AE-1 Program, capturing exceptional images and preserving the legacy of this beloved film camera․

Encouragement to Explore Further

With the Canon AE-1 Program Manual as your guide, take the next step in mastering this timeless camera․ Experiment with advanced techniques like manual focus and multi-exposure to unlock its full creative potential․ The camera’s versatility, combined with its robust design, makes it a joy to use for photographers of all skill levels․ Dive deeper into the world of film photography by exploring additional resources, tutorials, and community forums dedicated to the AE-1 Program․ Remember, practice and exploration are key to refining your craft․ Embrace the journey and continue to capture stunning moments with your Canon AE-1 Program․

diaper genie user manual

Welcome to the Diaper Genie user manual! This guide provides a comprehensive overview of the system, ensuring proper usage, maintenance, and troubleshooting for optimal performance and convenience.

1.1 Overview of the Diaper Genie System

The Diaper Genie is an innovative system designed to keep your nursery fresh and odor-free. It features a unique odor-locking mechanism with a 7-layer refill bag, ensuring odors stay trapped. The hands-free foot pedal offers convenience, making diaper disposal hygienic and efficient. Proper usage and maintenance are essential for optimal performance, as outlined in this manual to ensure longevity and effectiveness.

1.2 Importance of Proper Usage and Maintenance

Proper usage and maintenance are crucial for the Diaper Genie’s effectiveness. Following the guidelines ensures optimal odor control, prevents leaks, and extends the system’s lifespan. Regular cleaning, refilling, and filter replacements maintain hygiene and freshness. Adhering to these practices guarantees the system performs as intended, keeping your nursery clean and odor-free for your baby’s health and comfort.

Unboxing and Inventory of Components

Unboxing your Diaper Genie reveals essential components like the pail, lid, foot pedal, and refill system. Ensure all parts are included for proper assembly and functionality.

2.1 What’s Included in the Diaper Genie Package

The Diaper Genie package typically includes the main pail unit, a lid with odor-locking clamps, a foot pedal for hands-free operation, a starter refill with 7-layer bags, and an instruction manual. Additional components may vary by model but often feature a carbon filter for odor control and a protective liner for easy cleanup. Ensure all items are accounted for before assembly.

2.2 Understanding Each Part and Its Function

The Diaper Genie consists of a main pail, a lid with odor-locking clamps, a foot pedal for hands-free operation, and a refill system with 7-layer bags. The foot pedal allows easy opening, while the clamps secure the liner to prevent odor escape. The refill system ensures hygienic disposal, with each layer trapping bacteria and odors. Understanding these components is key to effective use and maintenance of the system.

Assembly and Setup Instructions

Assemble the Diaper Genie by attaching the foot pedal and aligning the lid. Insert the refill, ensuring the liner is securely locked in place for first use.

3.1 Step-by-Step Assembly Guide

Begin by unpacking all components, including the pail, lid, foot pedal, and refill. Attach the pedal to the base by aligning the hooks and securing tightly. Next, place the refill inside the pail, ensuring the liner is properly fed through the cutter. Finally, snap the lid onto the pail, ensuring it locks securely for a tight seal. This setup ensures the Diaper Genie is ready for first-time use, providing a hygienic and convenient diaper disposal system.

3.2 Preparing the Diaper Genie for First Use

After assembly, install a new refill by pulling the tab to remove the seal. Extend about 18 inches of film to line the pail, ensuring it covers the bottom. Tie a knot at the end of the film to secure it. Close the lid and test the foot pedal to ensure smooth operation. This setup guarantees odor containment and readiness for first use.

Inserting Refills and Liners

Inserting refills and liners is essential for maintaining the Diaper Genie’s odor-containment system. Proper installation ensures the pail functions effectively and keeps odors locked in securely.

4.1 How to Install a New Refill

To install a new refill, open the Diaper Genie and remove any old refill. Take the new refill, pull out about 18 inches of film, and tie a knot at the bottom. Secure the refill to the designated clips or hooks inside the pail. Ensure the liner is properly aligned and the knot is tight to prevent leaks. Close the Diaper Genie and it’s ready for use.

4.2 Ensuring Proper Liner Alignment

Align the liner by pulling out 18 inches of film and tying a knot at the bottom. Ensure the liner is snug and evenly seated at the base of the pail. Avoid twists or tucks that could cause misalignment. Proper alignment prevents leaks and ensures the pail closes tightly, maintaining odor control and hygiene. Regular checks guarantee optimal performance.

Operating the Diaper Genie

The Diaper Genie features a foot pedal for hands-free operation, a 7-layer refill system, and an odor-locking design to keep your nursery fresh and clean effortlessly for all diapers.

5.1 Using the Foot Pedal for Hands-Free Operation

The Diaper Genie’s foot pedal allows for hands-free operation, making it convenient for parents. Step on the pedal to open the lid, place the diaper inside, and release to seal. This feature ensures odors are trapped and prevents cross-contamination, keeping your nursery fresh and hygienic. Regular use maintains efficiency and ease of diaper disposal, making it a practical solution for busy parents to manage waste effectively.

5.2 Disposing of Diapers Correctly

For correct disposal, place soiled diapers into the Diaper Genie using the foot pedal to avoid touching the lid. Ensure each diaper is tightly wrapped or sealed within the liner. For bulkier diapers, tie a knot in the liner before disposal. Regularly empty the pail when full to maintain hygiene and prevent odor buildup, ensuring the system functions optimally for long-term effectiveness and convenience.

Odor Control and Air-Tite Technology

The Diaper Genie’s Air-Tite Technology and 7-layer refill system effectively trap odors, keeping your nursery fresh and germ-free. This advanced design ensures long-lasting odor control and convenience.

6.1 Understanding the 7-Layer Refill System

The 7-layer refill system is designed to lock in odors and germs effectively. Each layer provides a barrier against smells and bacteria, ensuring the nursery stays fresh. The refills are easy to install and replace, making maintenance simple. This technology is a key feature of the Diaper Genie, enhancing its performance and convenience for parents.

6.2 How the Double-Lock Design Prevents Odors

The Double-Lock design features a physical barrier and airtight seal, preventing odors from escaping. When the lid closes, it traps smells inside, ensuring freshness. This mechanism is activated each time a diaper is disposed of, making it highly effective in maintaining a odor-free environment for parents and babies alike.

Emptying the Diaper Genie

Emptying is simple: pull enough liner to tie a knot, dispose of the bag, and refill as needed to maintain hygiene and odor control effectively.

7;1 When to Empty the Pail

Empty the Diaper Genie when it’s 2/3 full or when odors become noticeable. For optimal hygiene, dispose of the refill bag when it’s full or every 2-3 days of use. Regular emptying prevents odor buildup and ensures the system functions effectively. The pail can hold up to 36 newborn-sized diapers, making it convenient for busy parents; Always tie the liner securely before disposal to maintain freshness.

7.2 Proper Disposal of Full Refill Bags

Once the refill bag is full, tie it securely at the top to prevent leaks. Use the pedal to lower the bag into the pail, ensuring the lid seals tightly. Dispose of the bag in an outdoor trash can to maintain hygiene. Always follow local waste disposal guidelines for sanitary products. This helps keep your nursery fresh and odor-free.

Maintenance and Cleaning Tips

Regularly clean the Diaper Genie to prevent odors and bacteria growth. Replace the carbon filter as recommended to maintain freshness and efficiency in odor control.

8.1 Regular Cleaning to Prevent Odors

Regular cleaning is essential to prevent odors and bacterial growth in your Diaper Genie. Wipe down the pail and lid with a mild detergent and warm water after emptying. Sanitize all surfaces, paying attention to areas around the lid and pedal. Regular maintenance ensures a fresh environment and prolongs the system’s efficiency in odor control.

8.2 Replacing the Carbon Filter

To maintain the Diaper Genie’s odor-control effectiveness, replace the carbon filter every 1-2 months or when odors persist. Locate the filter in the lid, remove the old one, and insert a new filter. Ensure it’s securely fitted to maximize odor absorption. Regular replacement keeps your nursery smelling fresh and prevents bacteria growth, ensuring optimal system performance.

Troubleshooting Common Issues

Troubleshooting common issues with your Diaper Genie, such as jammed lids or odor leaks, ensures optimal performance and a fresh nursery environment. Regular maintenance helps prevent these problems.

9.1 Diagnosing and Fixing Jammed Lids

If the lid of your Diaper Genie is jammed, start by lifting it manually to check for any blockages or misaligned parts. Ensure the pedal is clean and free of debris, as dirt can cause the mechanism to stick. If the issue persists, gently realign the lid and pedal connection. Regular cleaning and maintenance can help prevent such problems and ensure smooth operation.

9.2 Resolving Odor Leaks

If you notice odor leaks, ensure the refill is properly installed and the clamp is securely closed. Check for any tears in the liner or misalignment of the Double-Lock design. Regularly emptying the pail and replacing the carbon filter can also help minimize odors. For persistent issues, inspect the seals and replace any worn-out parts to maintain the system’s effectiveness and keep your nursery fresh.

Replacement Parts and Accessories

Ensure your Diaper Genie system remains effective by replacing parts like the carbon filter and 7-layer refills regularly. Visit authorized retailers for genuine accessories to maintain performance and hygiene, guaranteeing long-term functionality and odor control. Always purchase compatible items to preserve the system’s efficiency and your satisfaction.

10.1 Where to Buy Refills and Filters

Refills and filters for your Diaper Genie are available at major retailers like Amazon, Walmart, and Target, as well as on the official Playtex website. Ensure you purchase genuine products to maintain system performance and hygiene. These retailers offer convenient online shopping options, with some providing in-store availability for immediate purchase. Always check for compatibility to guarantee optimal functionality and extend the life of your Diaper Genie system.

10.2 Compatible Accessories for the Diaper Genie

Enhance your Diaper Genie experience with compatible accessories like odor-absorbing sprays, replacement pail liners, and cleaning kits. These items are designed to maintain the system’s performance and extend its lifespan. Visit the official Playtex website or authorized retailers to explore accessory options tailored to your Diaper Genie model, ensuring compatibility and optimal functionality for a fresher, cleaner nursery environment.

Safety Precautions

Ensure the pail is stable to prevent tipping. Use only authorized parts to maintain safety. Properly dispose of sharp objects like diaper tabs to avoid injuries and keep the surrounding area clean to prevent slipping hazards.

11.1 Keeping the Diaper Genie Out of Reach of Children

Always place the Diaper Genie in a secure location where children cannot access it. Curious toddlers may attempt to open the pail or play with its components, leading to potential safety hazards. Ensure the unit is stored in a stable position to prevent tipping and keep harmful contents out of children’s reach for their protection and your peace of mind.

11.2 Avoiding Overfilling the Pail

Avoid overfilling the Diaper Genie pail to prevent odor leaks and maintain its efficiency. Regularly check the fill level and empty it when necessary. Overfilling can cause the liner to tear or the lid to malfunction, leading to unpleasant odors and potential damage. Always ensure the pail is used as intended to keep your nursery clean and odor-free. Proper maintenance ensures long-term functionality and hygiene.

Eco-Friendly Considerations

The Diaper Genie helps reduce waste by minimizing frequent bag changes. Its 7-layer refill system locks in odors, reducing the need for additional trash bags. Always opt for recycling options when disposing of used refills to promote sustainability and minimize environmental impact. Eco-conscious practices ensure a greener future for your baby.

12.1 Reducing Waste with the Diaper Genie

The Diaper Genie’s 7-layer refill system minimizes waste by reducing frequent bag changes. Its Air-Tite technology and Double-Lock design prevent odor leaks, cutting the need for extra trash bags. This eco-friendly approach ensures fewer materials are used, making the Diaper Genie a sustainable choice for parents. By locking in odors and extending bag life, it helps reduce overall waste, promoting a greener nursery environment.

12.2 Recycling Options for Used Refills

Check with local recycling programs to see if they accept used Diaper Genie refills, as policies vary by location. Some communities may recycle the plastic components, while others may not. For eco-conscious disposal, consider inquiring with waste management services or the manufacturer about specialized recycling initiatives. Proper disposal methods ensure environmental responsibility when recycling options are unavailable.

Tips and Hacks for Optimal Use

  • Use the foot pedal for hands-free operation, keeping your hands clean and free.
  • Regularly check the refill level to avoid running out unexpectedly.
  • Ensure the lid closes properly after each use to maintain odor control.

13.1 Using Trash Bags as Refill Alternatives

For a cost-effective solution, use heavy-duty trash bags as Diaper Genie refills. Choose durable bags to prevent tears and ensure compatibility with the machine’s cutting mechanism. While this hack saves money, it may compromise odor control and longevity; Official refills are recommended for optimal performance and warranty maintenance. Always check size and material thickness for best results.

13.2 Smart Parenting Hacks for Diaper Disposal

Enhance your diaper disposal routine with clever hacks! Use the foot pedal for hands-free operation, keeping your hands clean. Empty the pail when it’s two-thirds full to avoid odor leaks. Sprinkle baking soda or essential oils inside for freshness. Store extra refills nearby for convenience. For small spaces, consider using the Diaper Genie for other baby waste too, like wipes or small clothing items. These tips streamline diaper care, making parenting easier and more efficient.

The Diaper Genie is a game-changer for parents, offering convenience, odor control, and hygiene. Follow the manual for optimal use and long-term satisfaction with this essential tool.

14.1 Summary of Key Features and Benefits

The Diaper Genie offers a convenient, odor-controlled solution for diaper disposal. Key features include its Double-Lock design, 7-layer refill bags, and hands-free foot pedal operation. The system is designed to keep nurseries fresh and hygienic, with a large capacity to reduce frequent emptying. These features make it an essential tool for parents, providing long-term satisfaction and ease of use.

  • Odor Control: Advanced 7-layer bags and Double-Lock technology trap smells effectively.
  • Hands-Free Operation: The foot pedal allows easy use even with full hands.
  • Large Capacity: Holds up to 36 newborn diapers, reducing trips to the trash.
  • Convenience: Easy to assemble and maintain for optimal performance.

14.2 Final Tips for Long-Term Satisfaction

For lasting satisfaction, regularly clean the Diaper Genie, replace the carbon filter, and check for wear and tear. Ensure liners are properly aligned and refills are installed correctly to maintain odor control. Empty the pail when full to prevent leaks and odors. By following these tips, you’ll enjoy a hygienic and convenient diaper disposal experience for years to come.

  • Regular Maintenance: Clean and inspect the pail frequently.
  • Proper Refills: Use genuine Diaper Genie refills for optimal performance.
  • Timely Emptying: Avoid overfilling to keep your nursery fresh.